Premium commands
Please note all the commands have to be written without the “ “, and into the group chat - not in PM with Ragebot (unless stated otherwise).
If you are having trouble with any of these commands, join #Rage_Bot_Premium for support.
For basic Rage commands, tap here.
Admins are never affected by any restrictions that Rage imposes on users and they'll never get kicked by Rage.
|
This color: only admins can use the command. This color: it's a PM-only command. |
★ ⚯ ✍︎ ⎘ |
Set name Rage bot (Premium owner command)
With set name you can change the name of your bot.
This needs to be done the first time you set up your Premium Rage, but you can always change it again at a later point.
The name will have to include a first name and a last name.
The command should be typed in PM with your Premium bot.
This command only works for the bot owner.
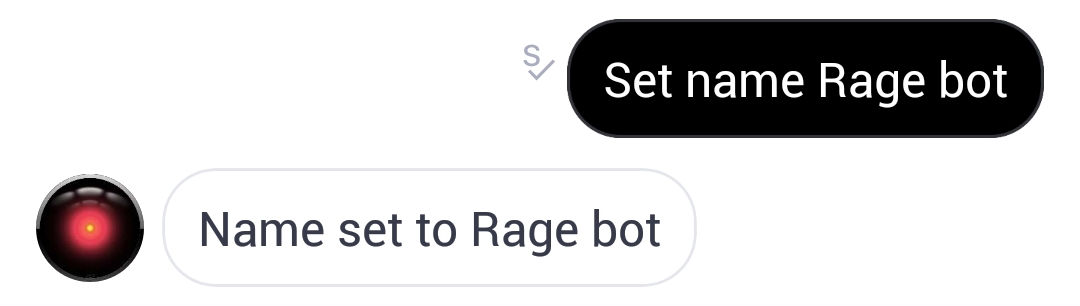 The set name should be typed in one sentence like in the screenshot above.
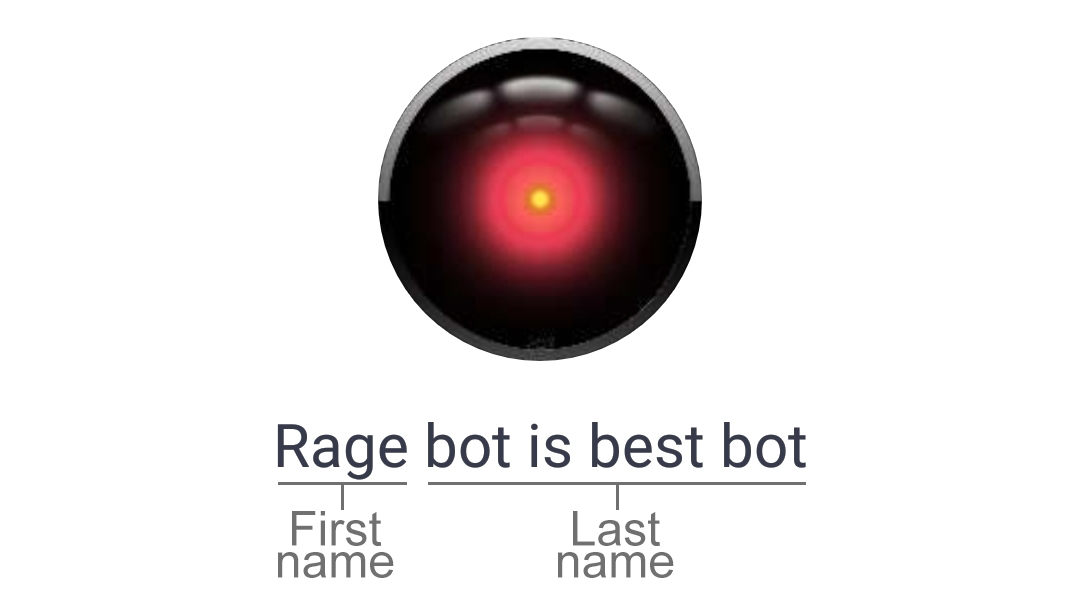 You can choose to have multiple names/words in the last name of your bot - but keep in mind that only the first name will be displayed in groups.
It can take a little time for the name to update. You can speed up the process by restarting your Kik.
In groups it takes longer due to Kik's group caching - this is unfortunately not something we can control.
Set picture usage:
Set picture (Premium owner command)
With set picture you can set up / change the profile picture of your bot.
This needs to be done the first time you set up your Premium Rage, but you can always change it again at a later point.
The picture should preferably be a perfect square, or the outcome may end up looking messy - if the picture is not a perfect square, we recommend cropping it first.
Important: don't use pictures that are NSFW/adult themed or any pictures that breaks the Community Standard of Kik - or your bot might get banned.
The command should be typed in PM with your Premium bot.
This command only works for the bot owner.
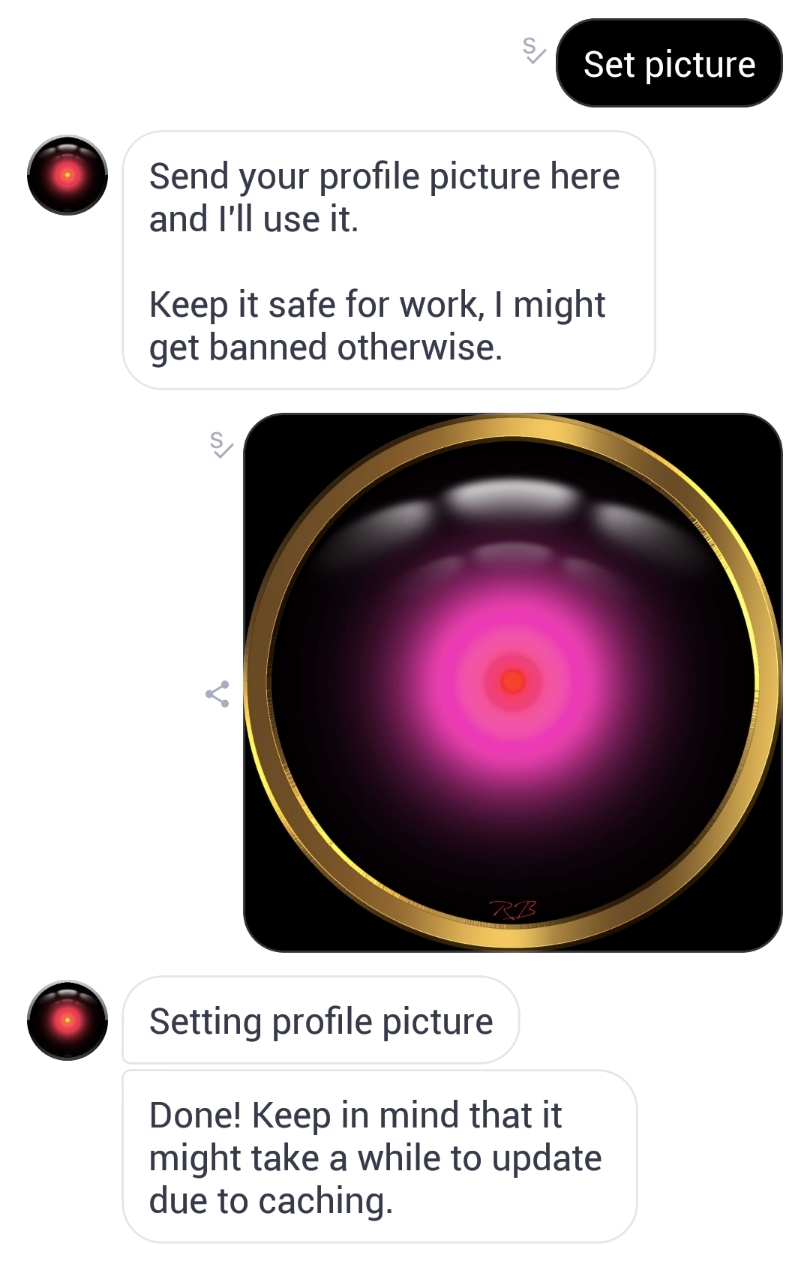 The set picture should be typed like in the screenshot above.
It can take a little time for the profile picture to update. You can speed up the process by restarting your Kik.
In groups it takes longer due to Kik's group caching - this is unfortunately not something we can control.
Set background usage:
Set background (Premium owner command)
With set background you can set up / change the background photo of your bot.
This needs to be done the first time you set up your Premium Rage, but you can always change it again at a later point.
Important: don't use pictures that are NSFW/adult themed or any pictures that breaks the Community Standard of Kik - or your bot might get banned.
The command should be typed in PM with your Premium bot.
This command only works for the bot owner.
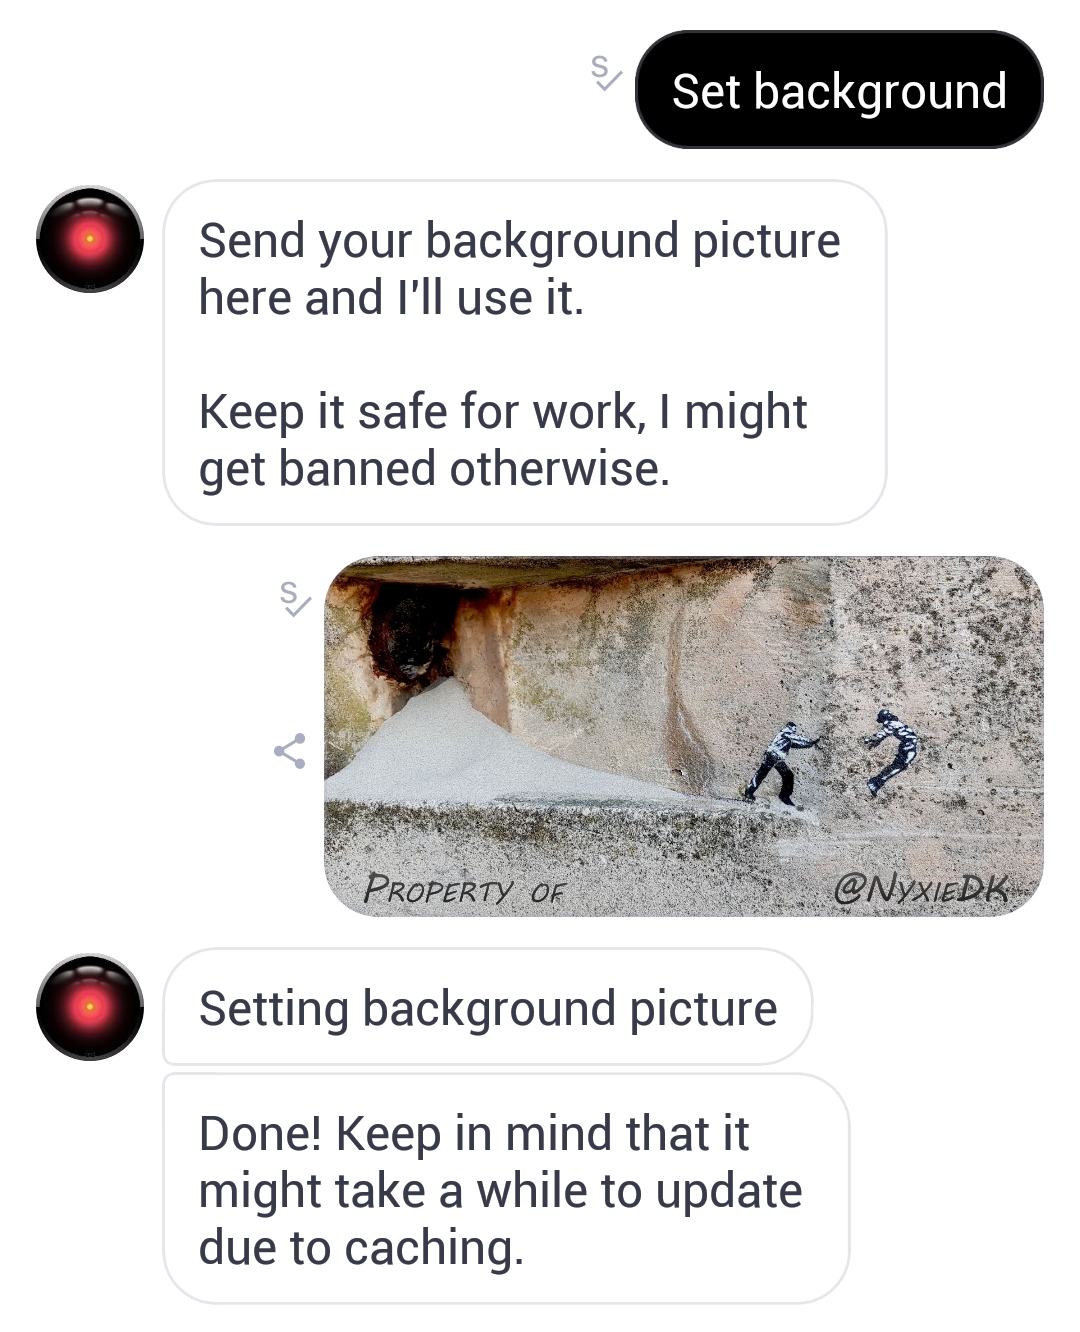 The set background should be typed like in the screenshot above.
 The end result after setting everything up.
It can take a little time for the background photo to update. You can speed up the process by restarting your Kik.
In groups it takes longer due to Kik's group caching - this is unfortunately not something we can control.
Groups (Premium owner command)
Leave 1 (Premium owner command)
With groups you can view what groups your Premium is in, and from there you can make it leave the groups you no longer want it to occupy.
You can also view how close you are to reaching your group limit.
Every Premium Rage has a limit of how many groups it can occupy - the limit depends on your payment plan.
You can read more about payment plans here.
The commands should be typed in PM with your Premium bot.
This command only works for the bot owner.
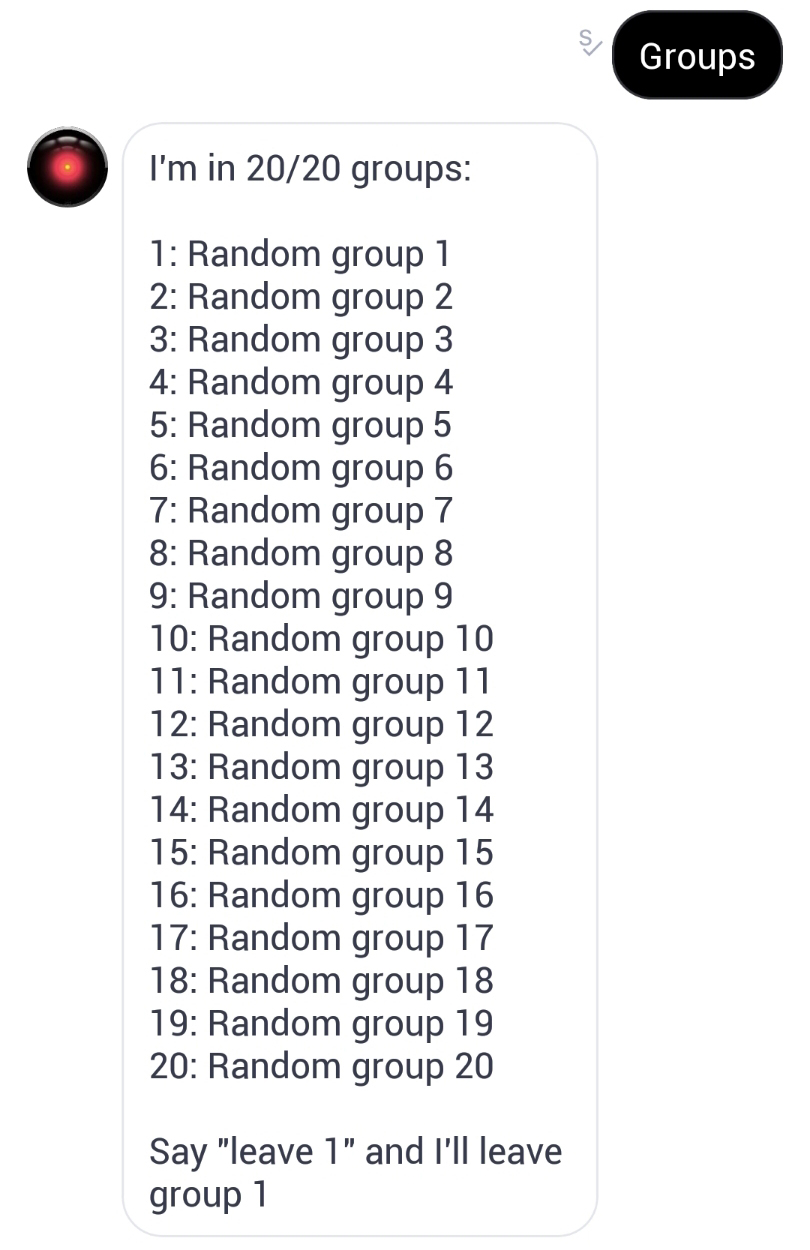 When typing "groups" to your bot in PM, it will respond with a numbered list of the groups it occupies.
For private groups, the names of the groups will be displayed, whereas for public groups it will display the hashtags instead.
In the example above, you can see that the bot is at its group limit - 20/20 groups.
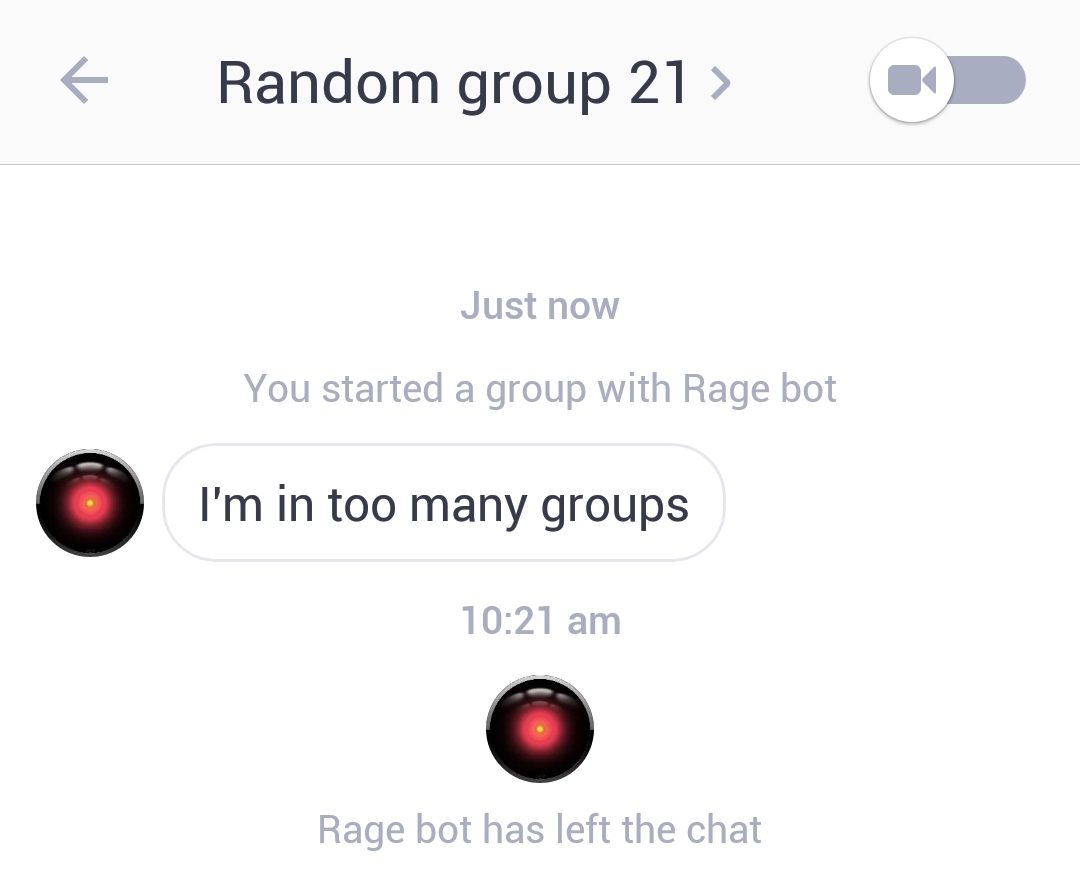 This is what will happen if you try to invite it to more groups after it has reached its limit.
The bot will prompty leave the group after being added to it.
If you want it to leave one of the groups it is already in, follow the instructions below.
 When having used the "groups" command, it will display a number to the left of the group name/hashtag.
You will need to use that number to make it leave said group.
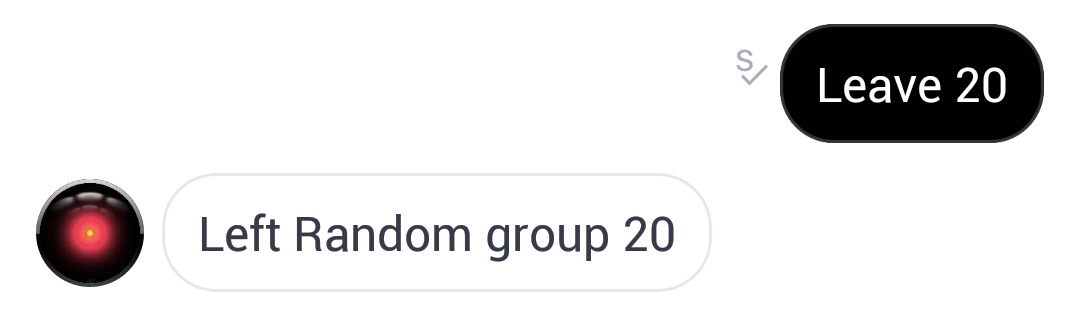
In the example above, we wanted it to leave the group named "random group 20".
It was the 20th group in our list - so we typed "leave 20".
Rage will respond with a confirmation of which group it left.
We recommend using this feature to make your Premium leave groups, instead of manually removing it or using the "Rage leave" command.
If you use manual removal or the "Rage leave" command, it could take up to a week for the list to update properly.
Also, keep in mind that if you change the name of a private group your Premium Rage is in, it will take a while for the name to update in the "groups" list.
Transfer (Premium owner command)
Transfer all from 1 to 2 (Premium owner command)
Transfer substitutions from 1 to 2 (Premium owner command)
Transfer censor from 1 to 2 (Premium owner command)
Transfer settings from 1 to 2 (Premium owner command)
Transfer blacklist from 1 to 2 (Premium owner command)
Transfer captcha from 1 to 2 (Premium owner command)
Transfer ai from 1 to 2 (Premium owner command)
Transfer blacklist/censor from all to 1 (Premium owner command)
Transfer blacklist/censor from 1 to all (Premium owner command)
With transfer Premium owners can effectively transfer the group data from one group to another.
This is quite useful if you need to move groups or wish to use the same substitutions/settings in all of your groups but don't want the hassle of manually having to copy-pasting everything.
Most settings will be overwritten but some lists (substitutions, blacklist and censored list) will simply merge with the already-existing ones.
Please note that you need to have your Premium bot in both groups that you want to transfer from and to.
Be careful when using the transfer command - if you overwrite the data of the wrong group, you can use the "import all" command for a limited amount of time to import old backup data - but there is a chance this may not recover all of your previous data and settings.
There's different commands, depending on what you want to transfer.
The commands work by typing "Transfer all/Substitutions/Censor/Blacklist/Settings from (x) to (x)" - replacing (x) with the group number according to the "transfer" group list, however there are more detailed instructions below.
If you're looking to move your group and want to transfer all data and settings, you should use the "transfer all" command.
All settings and data in the group you are transferring to will be overwritten, with the exception of substitutions and censor lists - those two lists will merge instead.
If you want to wipe the already-existing lists in the group you are transferring to, then use the "delete all", "delete all admin" and "uncensor all" commands first.
Tap here for instructions.
It should look something like this:
In this example, we want to move everything from our old #TestDummyGroup (1) to our new #AnotherTestDummyGroup (2).
Important: notice the number listed in front of the name/hashtag of the group - this is the number you use in the transfer command.
It is very important that you type the correct number, otherwise you risk transferring the wrong group data and there is no way to undo this.
Your Premium bot will give a confirmation.
For transferring the substitutions list, you should use the "transfer substitutions" command - it will merge with the already-existing substitutions.
If you want to wipe all substitutions in the group you are transferring to, then use the "delete all" and "delete all admin" commands first.
Tap here for instructions.
First, open PM with your Premium bot and type "transfer".
It should look something like this:
In this example, we want to copy our substitutions list from our old #TestDummyGroup (1) to our new #AnotherTestDummyGroup (2).
Important: notice the number listed in front of the name/hashtag of the group - this is the number you use in the transfer command.
It is very important that you type the correct number, otherwise you risk transferring the wrong group data and there is no way to undo this.
Your Premium bot will give a confirmation.
For transferring the censor list, you should use the "transfer censor" command - it will merge with the already-existing censor list.
If you want to wipe all censored words in the group you are transferring to, then use the "uncensor all" command first.
Tap here for instructions.
First, open PM with your Premium bot and type "transfer".
It should look something like this:
In this example, we want to copy our censored words from our old #TestDummyGroup (1) to our new #AnotherTestDummyGroup (2).
Important: notice the number listed in front of the name/hashtag of the group - this is the number you use in the transfer command.
It is very important that you type the correct number, otherwise you risk transferring the wrong group data and there is no way to undo this.
Your Premium bot will give a confirmation.
Tap here and scroll down to learn how to transfer from 1 to all or all to 1 group(s).
For transferring the blacklist, you should use the "transfer blacklist" command - it will merge with the already-existing blacklist.
If you want to wipe the blacklist in the group you are transferring to, then use the "unblacklist all" command first.
Tap here for instructions.
First, open PM with your Premium bot and type "transfer".
It should look something like this:
In this example, we want to copy our blacklist from our old #TestDummyGroup (1) to our new #AnotherTestDummyGroup (2).
Important: notice the number listed in front of the name/hashtag of the group - this is the number you use in the transfer command.
It is very important that you type the correct number, otherwise you risk transferring the wrong group data and there is no way to undo this.
Your Premium bot will give a confirmation.
Tap here and scroll down to learn how to transfer from 1 to all or all to 1 group(s).
When transferring blacklist/censor, you can also choose to transfer from 1 to all or all to 1 group(s) - the lists will merge with the already-existing lists.
Tap here for instructions.
Here we're looking to copy our blacklist from our old #TestDummyGroup (1) to all groups that our Premium bot is in.
Note: This also works with "censor".
For transferring the group settings and data (settings for 48 mode, permissions, noobs, joining, crash codes and spam), you should use the "transfer settings" command.
All settings and data in the group you are transferring to will be overwritten
Tap here for detailed instructions.
First, open PM with your Premium bot and type "transfer".
It should look something like this:
In this example, we want to move our settings from our old #TestDummyGroup (1) to our new #AnotherTestDummyGroup (2).
Your Premium bot will give a confirmation.
Set captcha usage:
★ ⎘ ✍︎
Set captcha shows the command description
Set captcha word sets captcha as "word"
Set captcha time 2 sets captcha timer to 2 min (1-15)
Set captcha reply message custom reply on captcha completion
Delete captcha reply deletes custom reply
Delete captcha deletes and deactivates the captcha
With set captcha, you can set a specific word or phrase that users will have to say when they join the group.
If they don't say the captcha within the set amount of time (default time is 5 minutes), Rage will remove them after posting a default removal message - though keep in mind that Rage won't remove people who've been added by other members or those who are already in the group.
This feature is a great way to ensure that people who join your group actually read the rules, but make sure to place the instructions for the captcha somewhere so they know they need to say it.
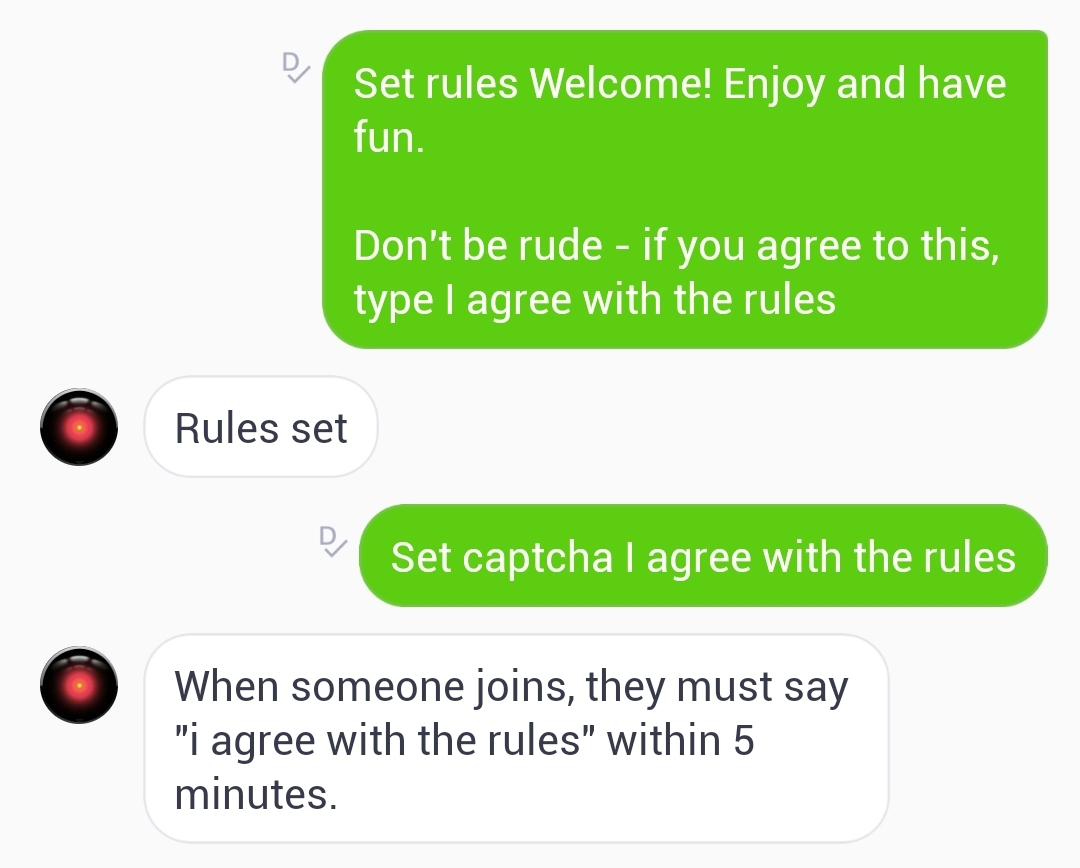 Before setting the captcha, we want to add the instructions to the rules.
So at the bottom of our rules, we add a paragraph stating "Don't be rude - if you agree to this, type I agree with the rules".
Then we set the captcha by typing "set captcha I agree with the rules".
Note: the captcha is not case sensitive and has a character limit of 100 characters. It can be a single word/number/emoji or a longer phrase as in the example above.
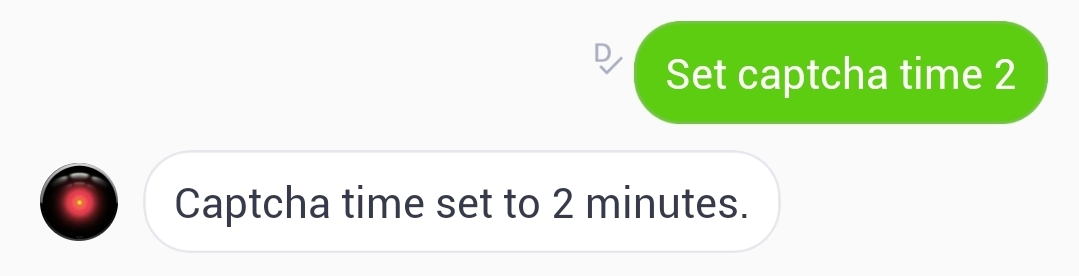 Additionally, we can adjust the captcha timer by typing "set captcha time 2" - this sets it to 2 minutes.
Note: it can be set to 1-15 minutes.
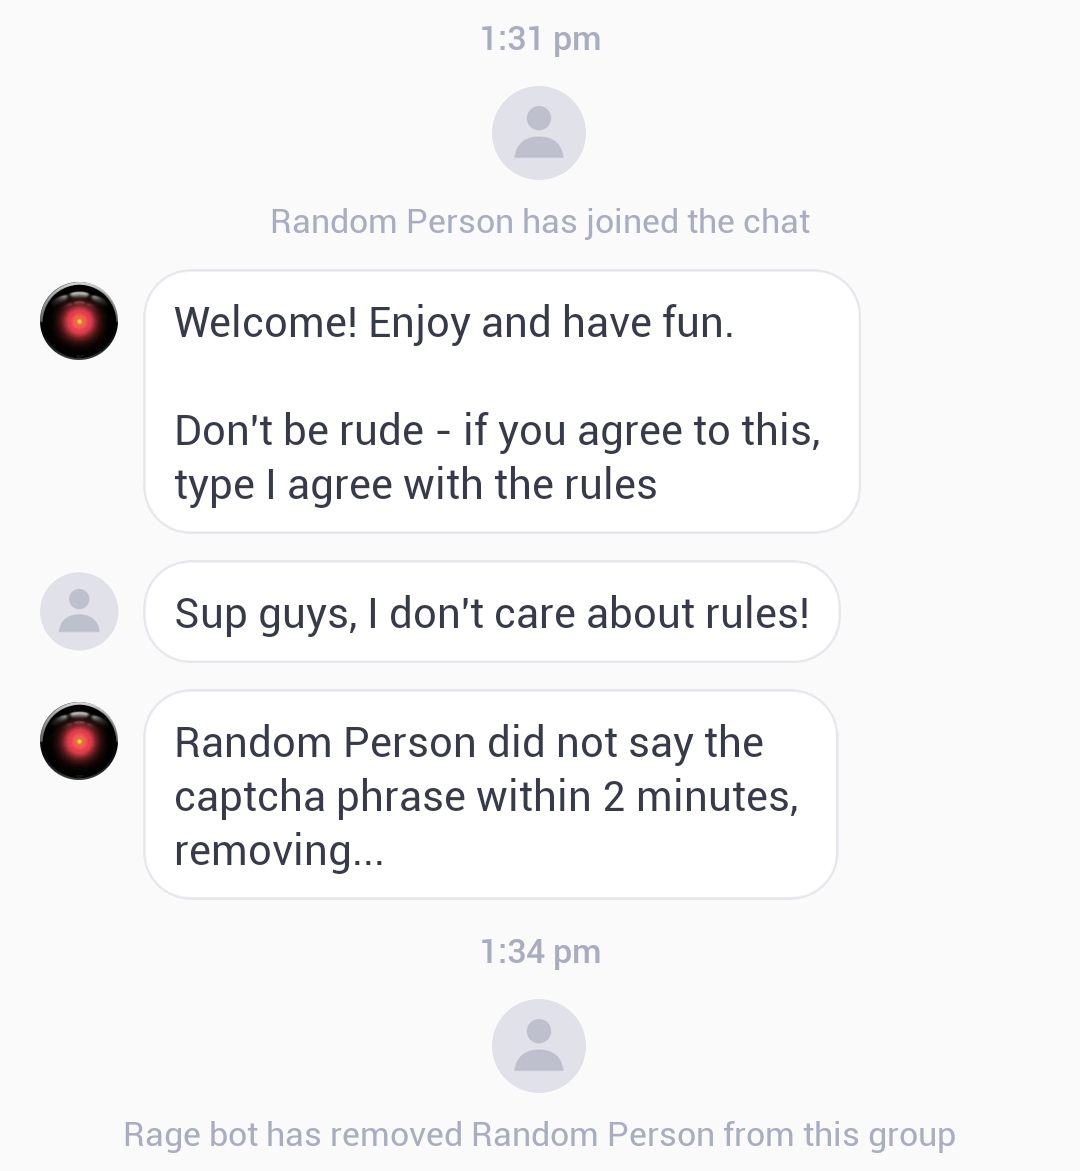 Here's a good example of what it'll look like if someone joins and doesn't complete the captcha.
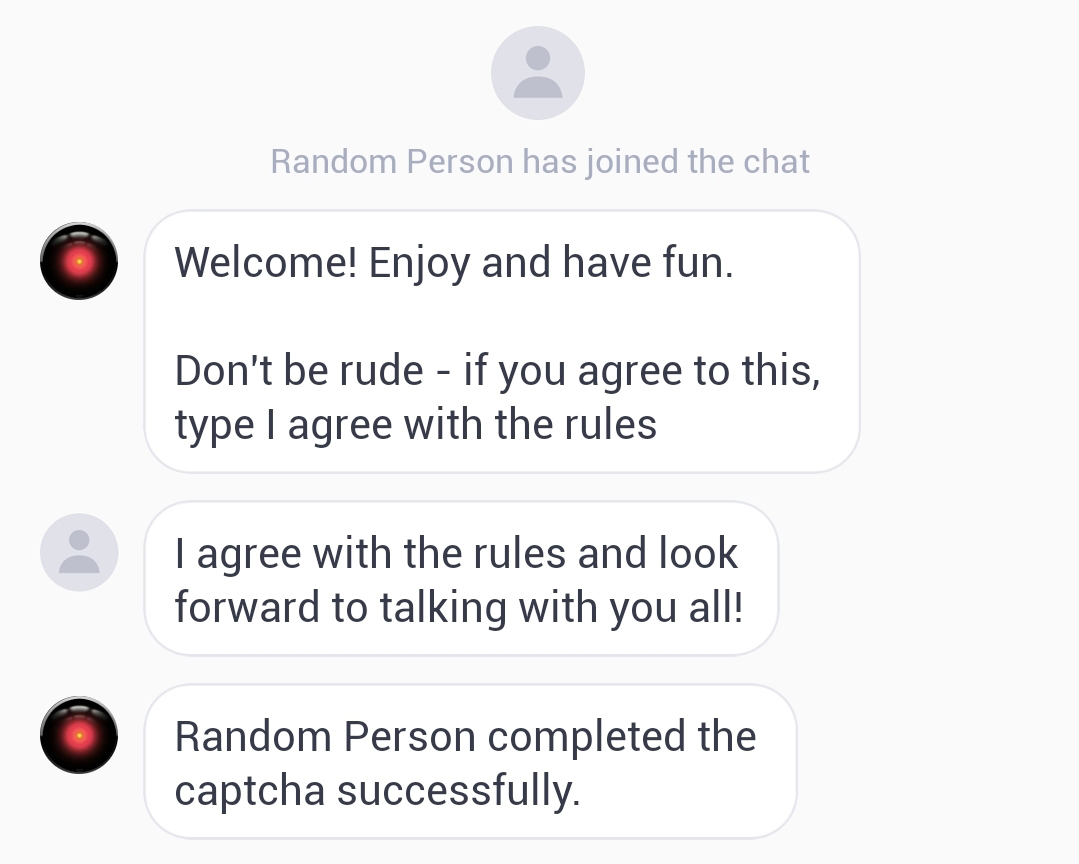 When someone joins and completes the captcha successfully, it will look something like this.
Note: The captcha doesn't have to be said separately, it'll be approved even if it's a part of a longer sentence.
If we wanted to set a custom reply upon completion, we can do so by typing "set captcha reply", followed by any text.
For example, "set captcha reply Excellent, captcha completed. If you experience any issues, contact one of our admins."
That would look something like this:
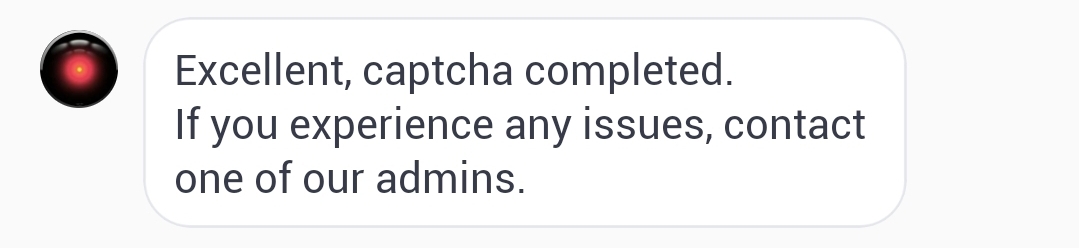 Custom captcha reply.
Alternative to disallow silent:
You can also choose to use this feature against bots, as an alternative to disallow silent.An example of this is demonstrated below.
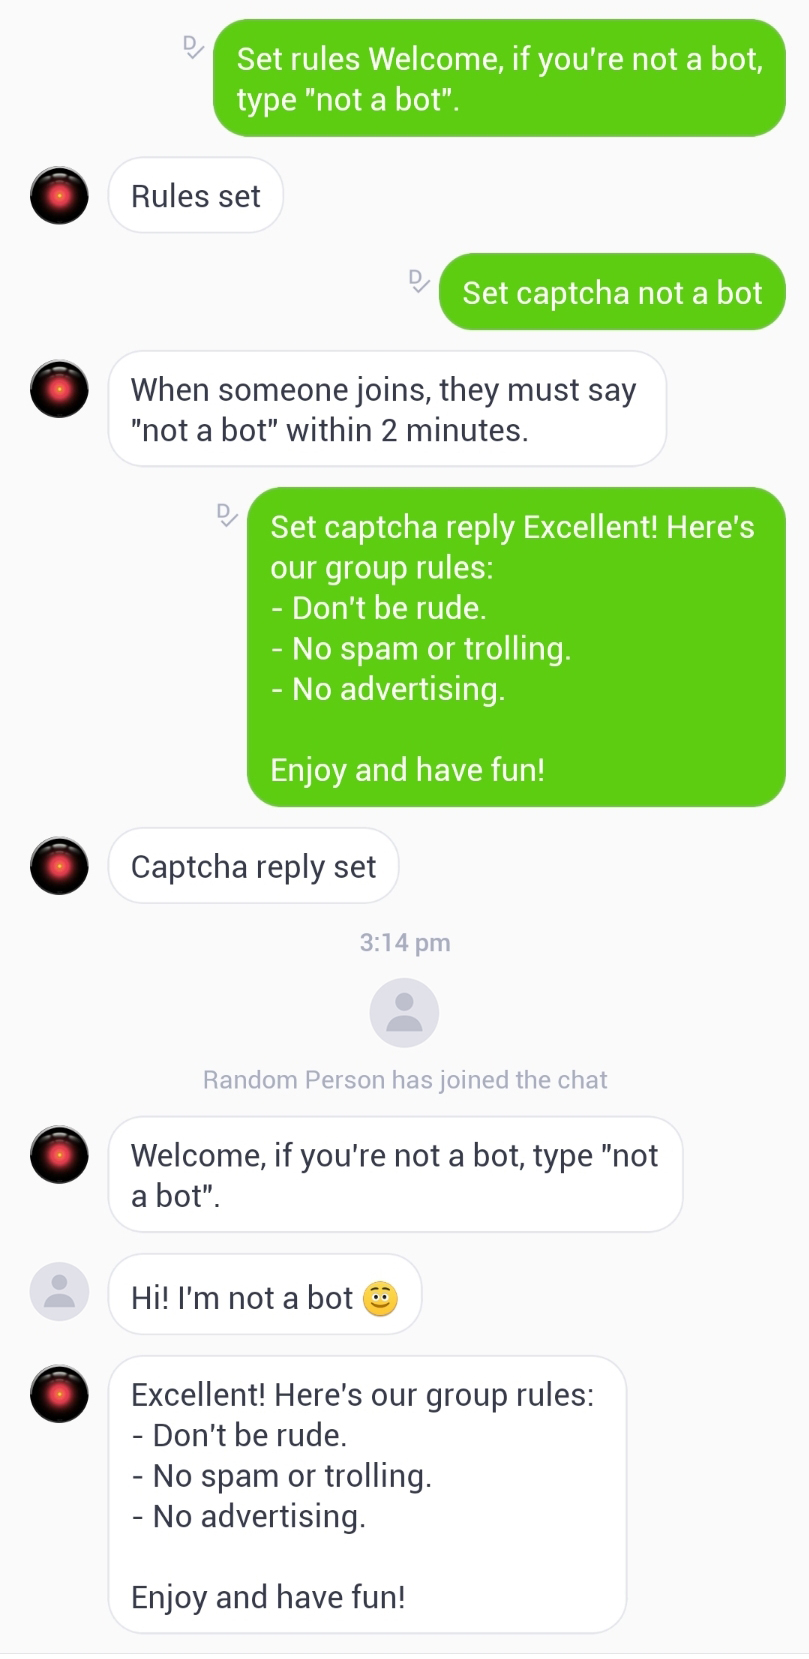 Firstly, we use the "set rules" feature. We're not going to actually list our rules here, instead we'll make the message very short, instructing newcomers to say "not a bot", which we will set as the captcha phrase.
Then we'll set a captcha reply where we'll list our real rules.
Using the feature this way is especially useful if you're tired of having very long rules posted every time a bot joins, as that can be spammy and disruptive to the group.
More advanced uses:
If your group only caters to a certain demographic, you can use the captcha feature to enforce this.Let's say we have a pizza loving group - but not just any pizza loving group. This is a pro-pineapple pizza group, and we want to keep out those pesky anti-pineapple people.
We'll provide an example below of one of the many ways you can do this.
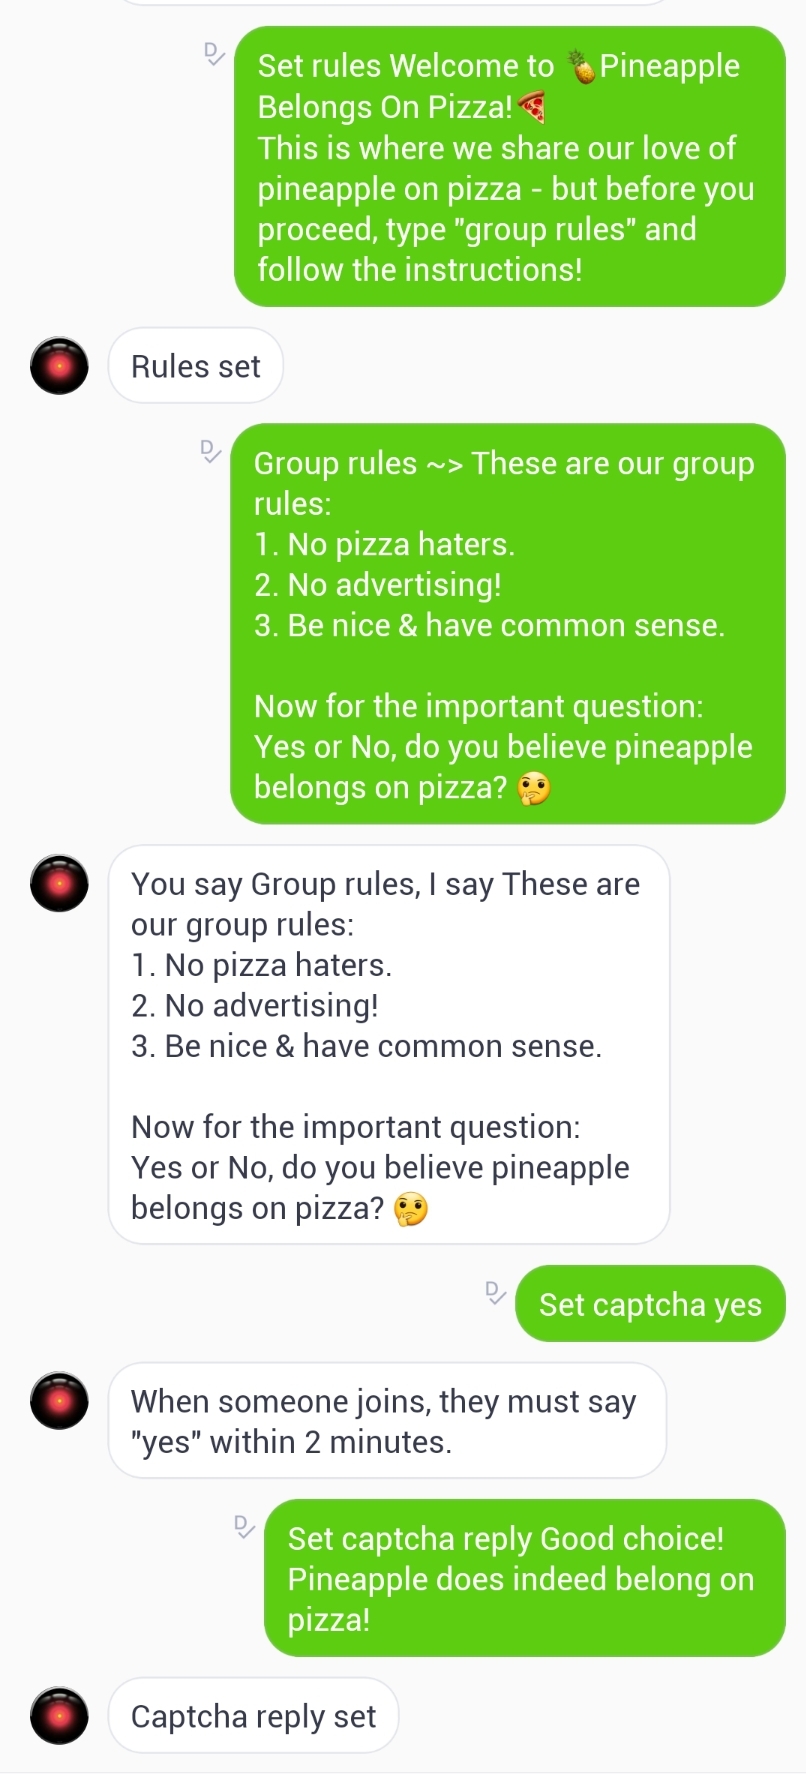 Firstly, we use the "set rules" feature. We're not going to actually list our rules here, instead we'll instruct them to trigger a separate substitution callled "group rules" that they will have to trigger in order to read our rules.
Then we create the "group rules" admin substitution. Here we'll list our rules, and place some instructions at the bottom. The instructions will ask if they like pineapple on pizza.
We're not going to push people towards one reply or the other, as we don't want anyone to be dishonest just for the sake of staying in the group.
Then we set the captcha phrase as "yes", and we add a captcha reply commending them for their wise choice if they complete the captcha.
Here is what it looks like if they say yes, and here's what it looks like if they say no.
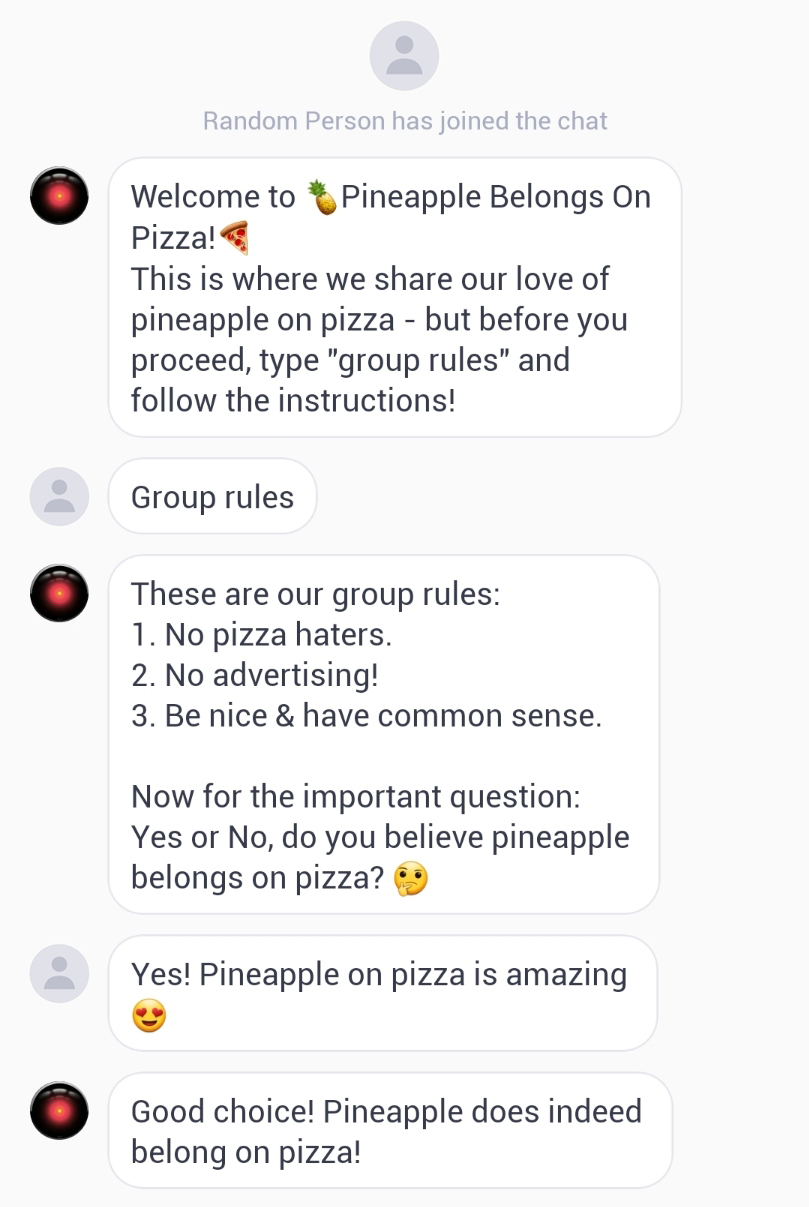 If captcha is completed successfully.
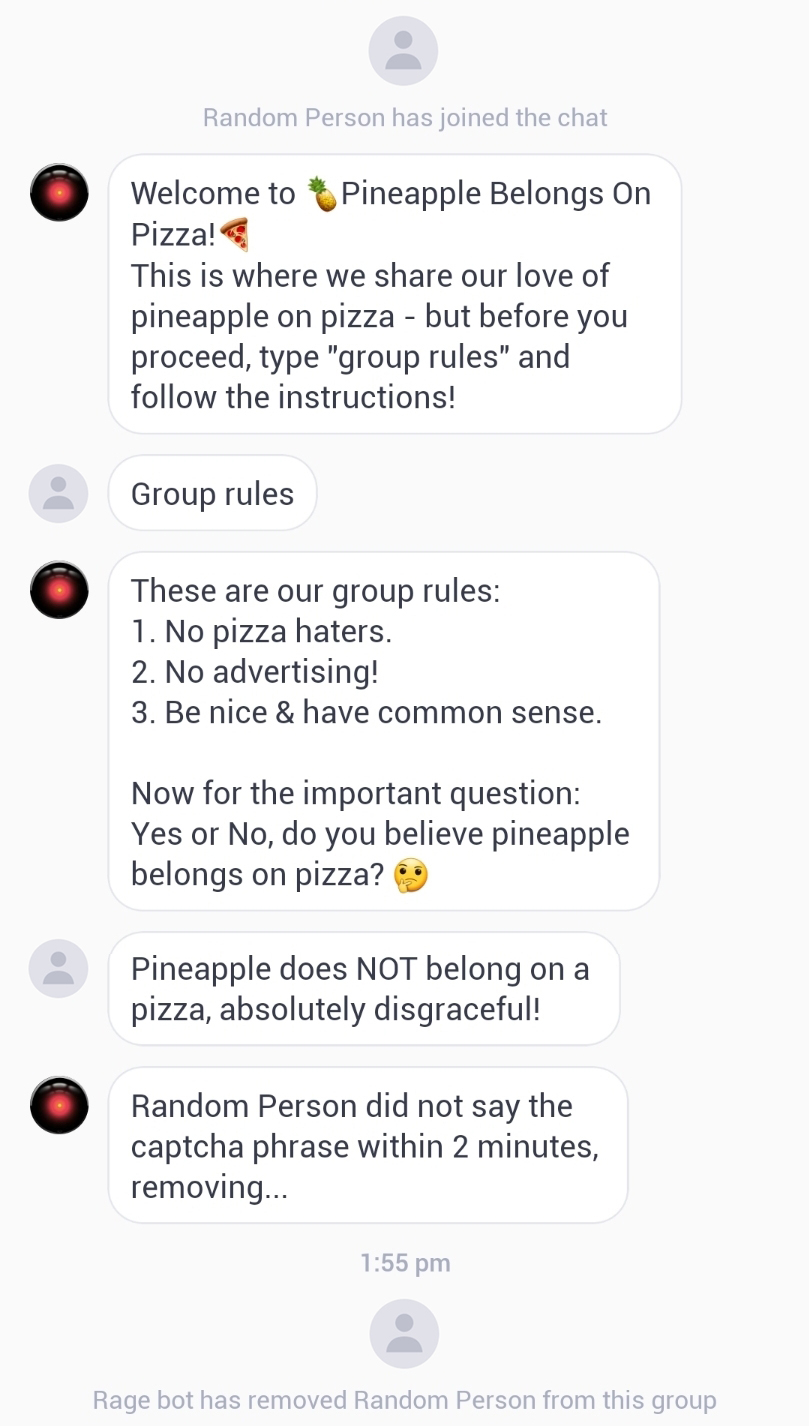 If they fail to complete the captcha.
Note: you can insert these instructions into the rules themselves, but placing them in a separate substitution adds an additional step they'll have to go through. This helps with sorting out people who don't really care about reading the rules.
Blacklist usage:
★ ⎘
Blacklist shows the command description
Blacklist list shows list of blacklisted users
Blacklist username self explanatory
Unblacklist username self explanatory
Blacklist last blacklists the last removed/left/banned/unbanned user
Unblacklist last unblacklists the last blacklisted/removed/banned/unbanned user
Unblacklist xx unblacklists a user by their identifier
Unblacklist all unnblacklists everyone
Blacklist banned blacklists all banned users [New!]
With blacklist, you can prevent unwanted people from joining your group, similar to banning.
If a blacklisted user attempts to join through group # (search), invite links or by being added by another user, Rage will remove them immediately after posting a default removal message - though keep in mind that Rage will not remove people who are already in the group.
With the ordinary ban feature of Kik you are only able to ban up to 100 users. Also you cannot ban someone until after they've already joined your group, and you cannot transfer the ban list to other groups.
This is why the blacklist feature is a useful substitute for ordinary banning.
Just like with other commands, you can transfer it across your groups and there's no limit for how many users you can blacklist.
Because this feature is more complicated than most of our commands, we will be very elaborate with our demonstrations below.
Blacklisting by username:
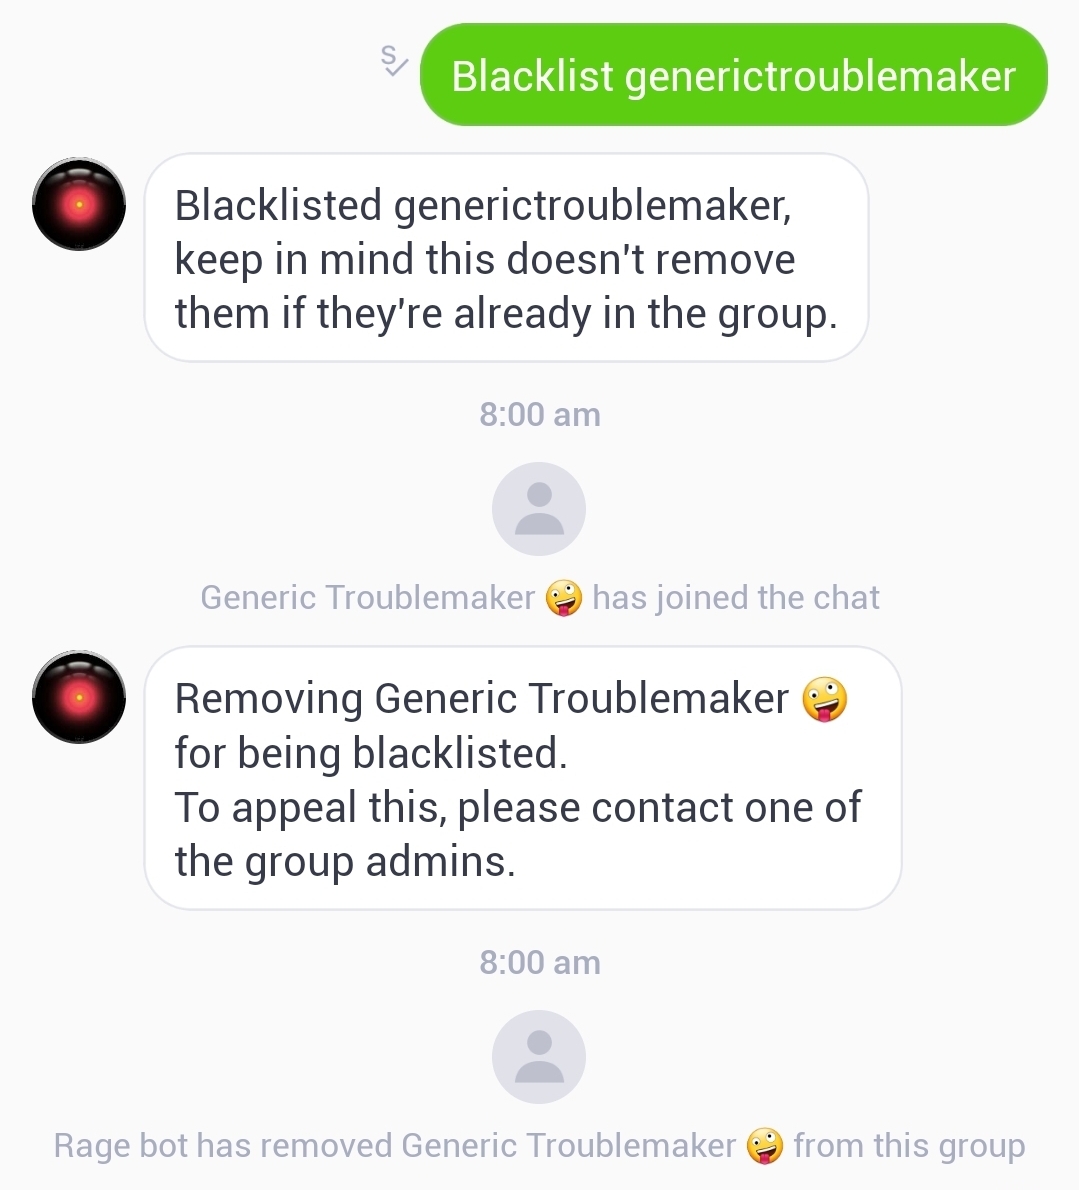 In order to blacklist someone by their username, we type "Blacklist" followed by their username.
In this case, we're typing "Blacklist generictroublemaker", as that is the username of the person in this example.
Next time they try to join the group, they will be met with the default removal message and get removed by Ragebot.
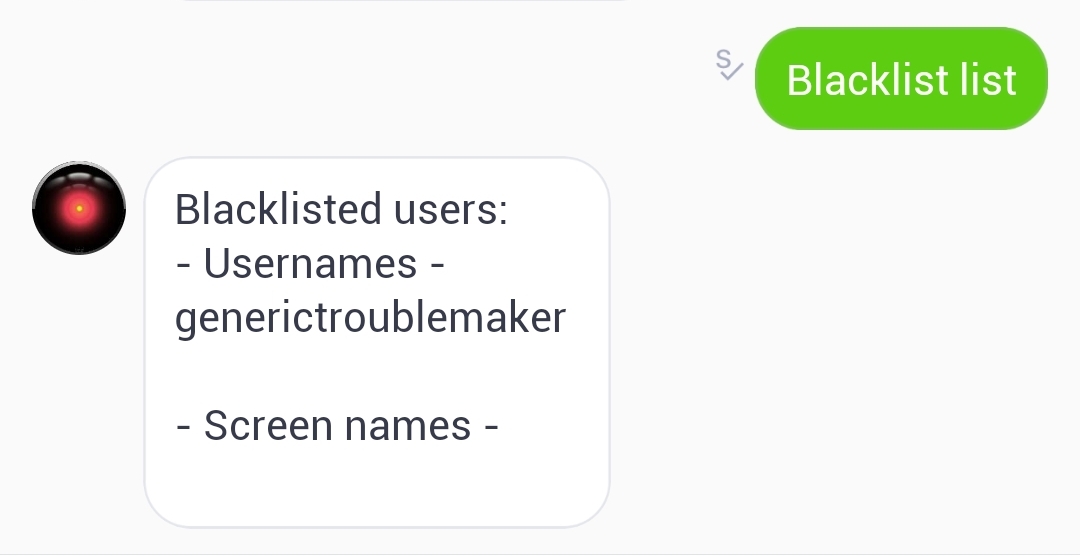 Type "Blacklist list" to see a list of blacklisted users.
 They'll be sorted into "Usernames" and "Screen names" category.
If you're looking to unblacklist someone, simply type "Unblacklist" followed by their username.
Blacklisting without username:
There'll be situations where you will be unable to blacklist by username - if someone joined, left a nasty message and left, or if they've got their DM's turned off.
For these situations, we will be using the "Blacklist last" command.
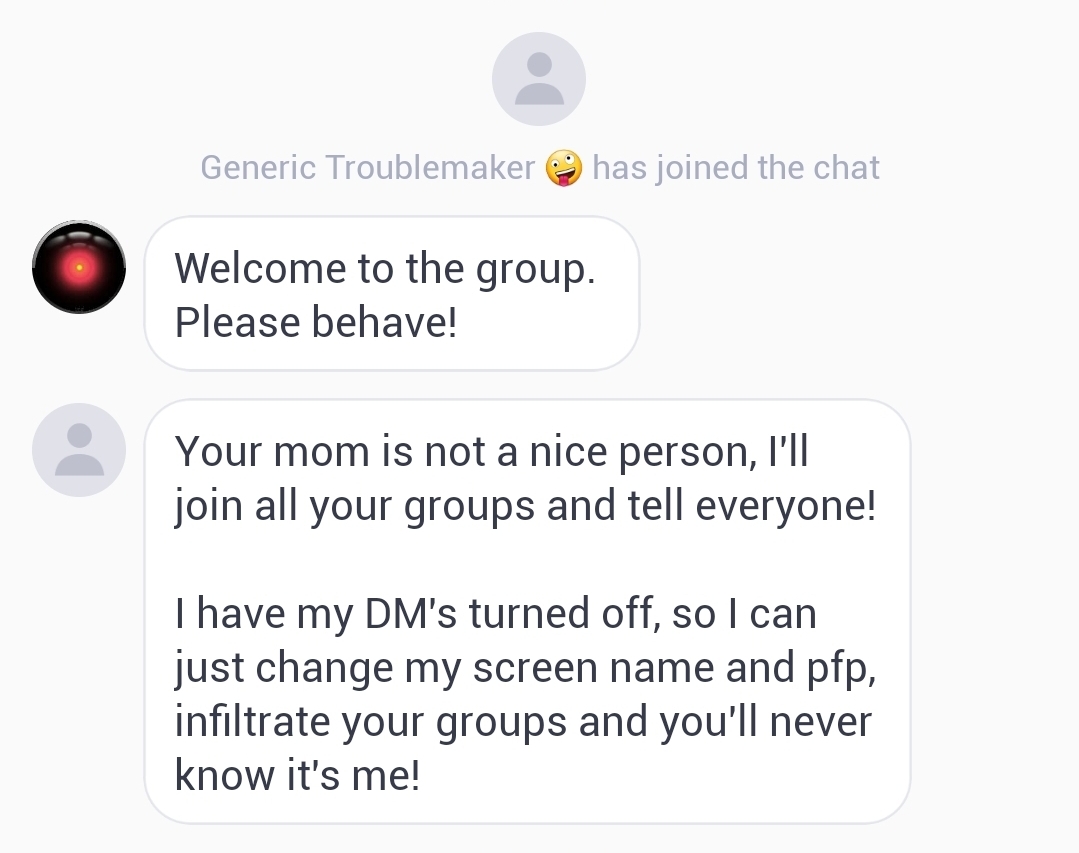 So here we have a classic troll joining to cause trouble, they got their DM's off, making it difficult to identify them and prevent them from joining your other groups.
Below we will demonstrate how to deal with this.
 First you remove him/her (as blacklist does not remove existing members), and then you type "Blacklist last".
"Blacklist last" basically blacklists the last person who left the group/was removed, banned or unbanned - even if they change their screen name.
Note: Ragebot doesn't store this data for very long, so if it's been a while since they were in your group, you may need to ban/unban them before using the "Blacklist last" command.
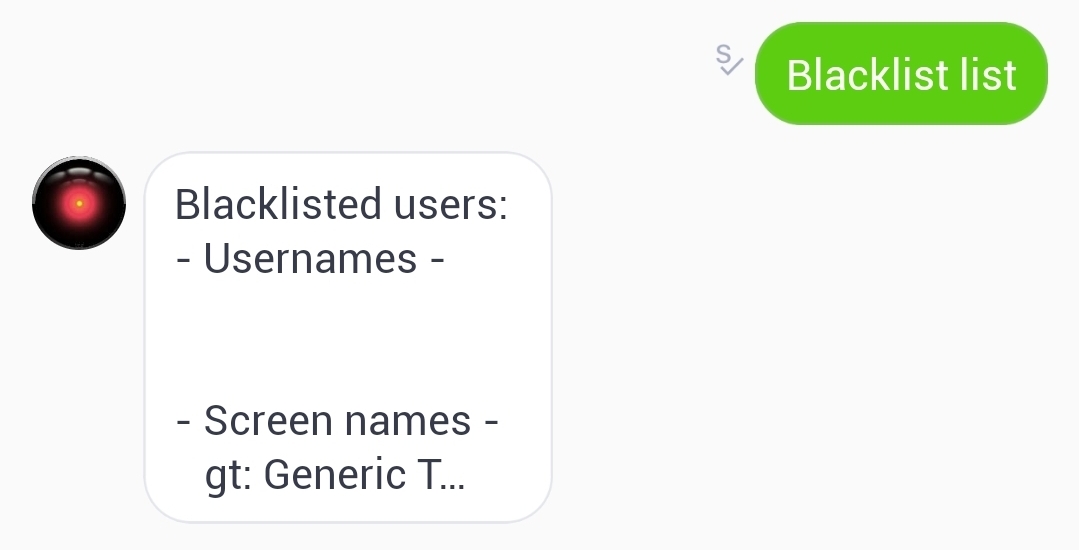 Using "Blacklist last" will place them under the "Screen Names" section, as you can see above - because we do not have their username.
You will see an identifier (usually two characters) in front of their screen name - "gt" in this instance - the purpose of this identifier is to be able to unblacklist them later, as people might use special characters in their name.
Note: This identifier is not related to the user's jid.
 If you're looking to unblacklist them, simply type "Unblacklist" followed by the identifier (usually two characters) in front of their name - in this example, you'd type "Unblacklist gt".
This removes them from your blacklist, and Ragebot will no longer remove them when they try to join the group.
Alternatively, if they recently tried to join your group, you can use the "Unblacklist last" command - this unblacklists the last person who was blacklisted, removed, banned or unbanned.
If you're looking to completely clear your blacklist, you can type "Unblacklist all".
Note: If you blacklisted someone with the "Blacklist last" command, you cannot unblacklist them by their username (and vice versa).
Blacklisting everyone from your ban list:
Sometimes it can feel very tedious having to manually clear your ban list - especially if you're looking to add the banned people to your blacklist.
We've implemented the "Blacklist banned" command to help speed up this process.
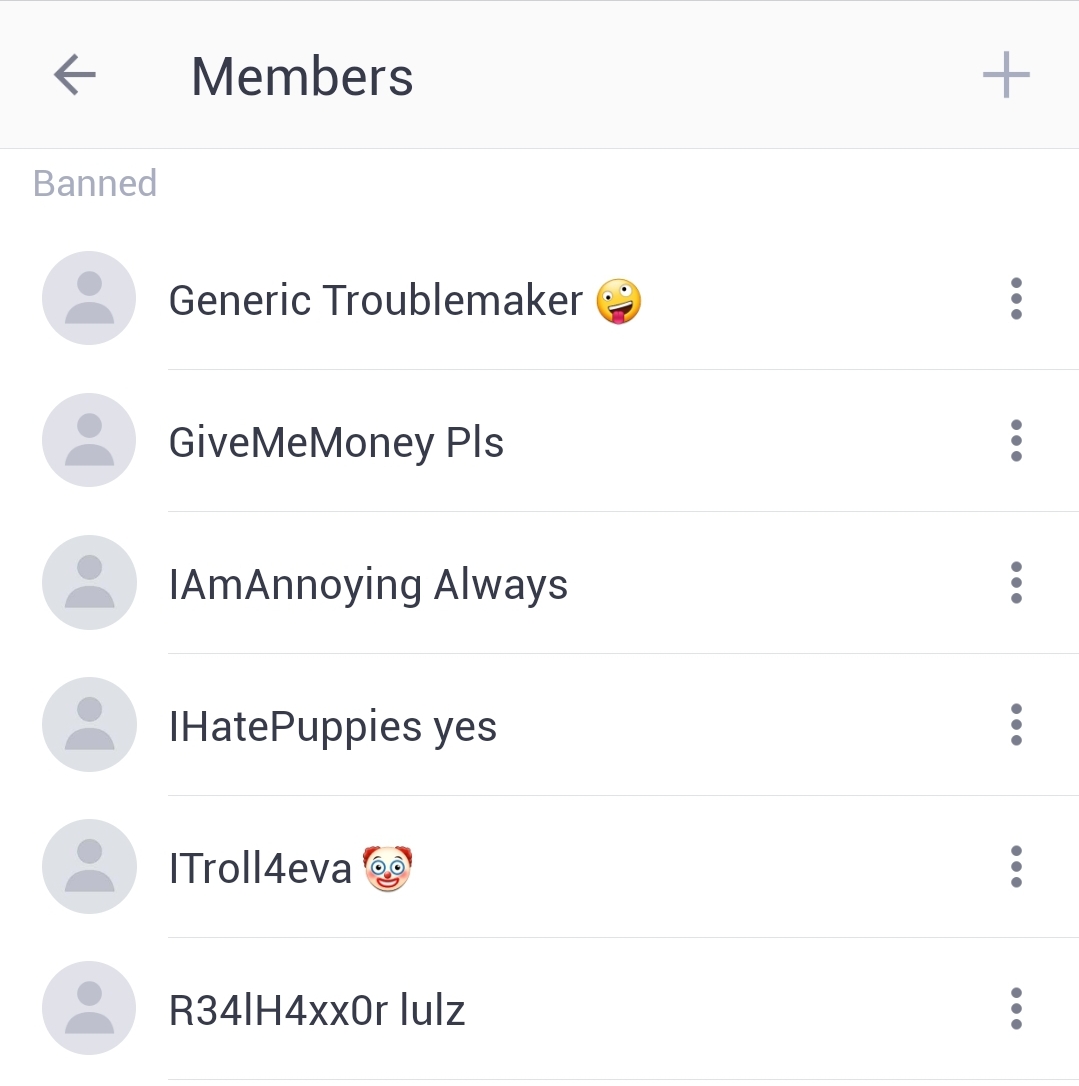 Here we have a list of banned people in one of our groups.
 By typing "Blacklist banned", Rage will automatically add them all to your blacklist, and unban them in the process - so they will no longer be taking up space in your ban list and you will be able to transfer the list to your other groups.
An example of this can be seen below.
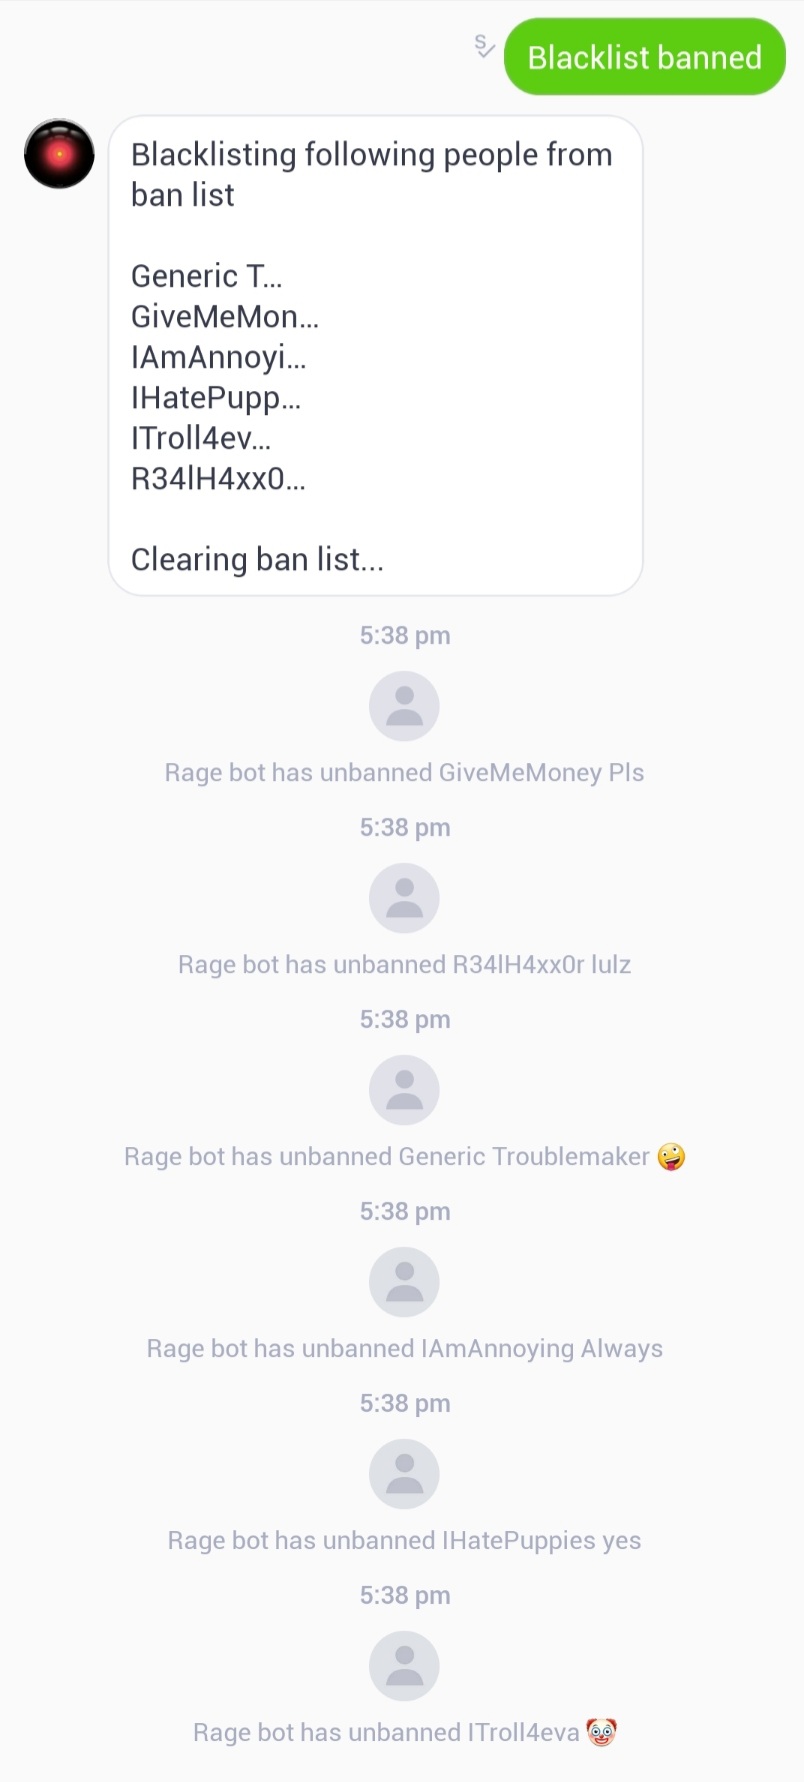 This is what it looks like when the entire ban list is "converted" to your blacklist.
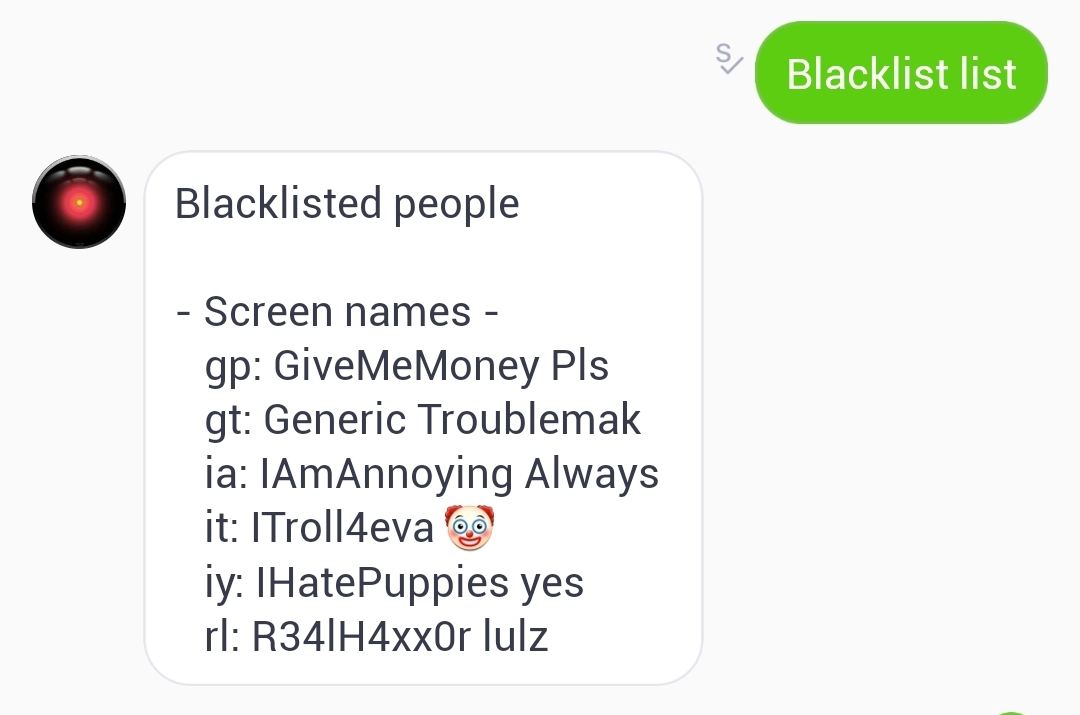 Typing "Blacklist list" will display everyone who is blacklisted, as well as the previously-banned people that are now in our blacklist.
Note: Any users that Ragebot cannot read, and users that no longer exists (deactivated/terminated) will not be unbanned nor added to the blacklist.
Whitelist usage:
★
Whitelist
Whitelist user
Unwhitelist user
Unwhitelist all
With whitelist, you can make any user of your group chat exempt from any type of removal by Rage - whether that be through 48 mode, or any of the Premium features (disallow spam, disallow crash codes, censored words and so on).
It means you no longer have to admin people out of concern that they'll be kicked by Rage.
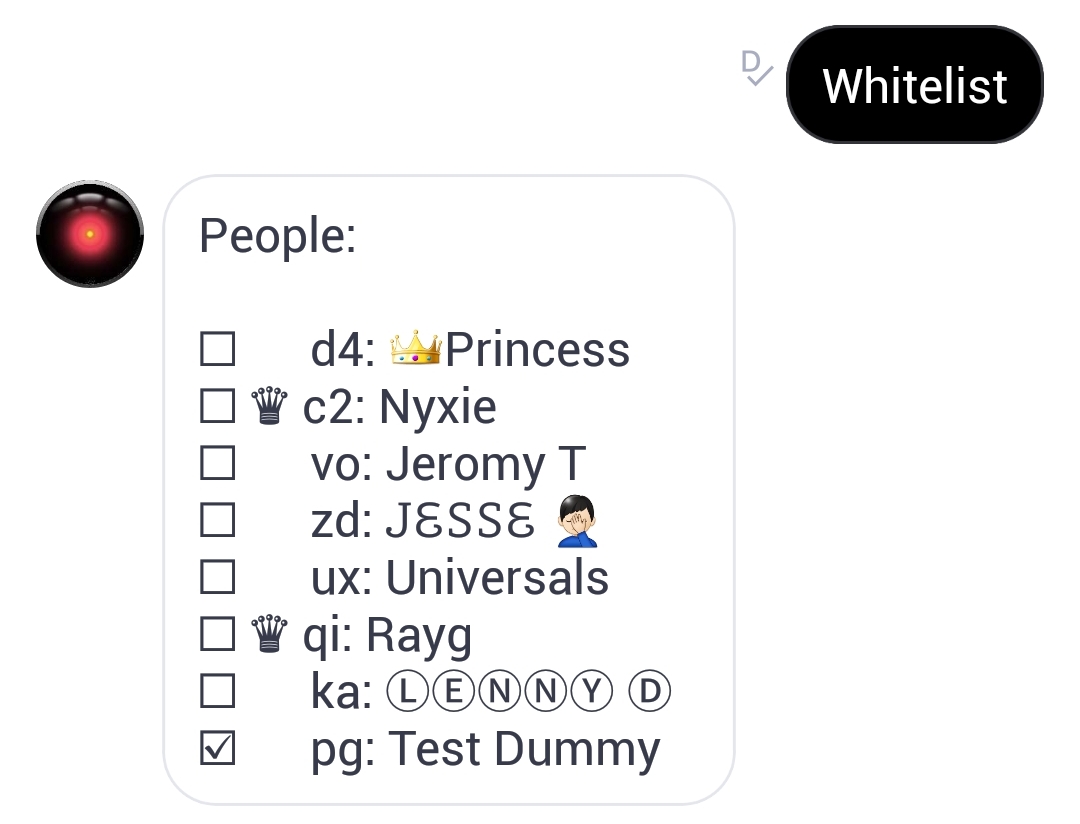
Type "whitelist" to see the list.
To the left there'll an empty box - if you whitelist a user, the box will be ticked.
There will be a crown next to the admins in the list.
There is also a user tag which is a unique couple of characters (they're the first couple of characters of the users jid).
After that, their name is displayed.
You can use either the user tag, or their first name to whitelist them (first and last name, along with username does not work - it has to be first name alone, or the user tag).
Example and how to whitelist a user is listed below:
 We want to whitelist pg: Test Dummy
We use the "whitelist" command to view the whitelist, and then proceed to whitelist "pg" (which is the user tag) - Rage gives a confirmation that we have whitelisted Test Dummy.
You could also have whitelisted this user by typing "whitelist Test".
The reason we have included the user tags in the whitelist is because there could be cases where people use the same first name in one group, or that people use special characters in their name (as you can see an example of in the screenshot above).
Without a user tag, it'd be impossible to whitelist people in these cases.
 Here you see there is now a ticked box next to pg: Test Dummy.
That means that Test Dummy is whitelisted.
Here you see there is now a ticked box next to pg: Test Dummy.
That means that Test Dummy is whitelisted.
 To remove Test Dummy from whitelist, simply type "unwhitelist pg", or "unwhitelist Test".
If you want to clear the entire whitelist, you can simply type "unwhitelist all".
You can also whitelist them by simply using their first name (Test) as demonstrated above.
Note: If Rage says that the name or tag is not found, simply use the tag provided by "whitelist" instead of their first name when whitelisting.
Extra note: You don't have to whitelist admins as they cannot be removed by Rage anyways.
Censor usage:
★ ⎘
Censor
Censor word
Uncensor word
Uncensor all
With censor, you can add any word(s) or sentences to the list of censored words - if a user says the word or phrase that is censored, they will be removed by Rage.
If a user says the word as a part of a sentence, they will also be removed.
If a user says the word inside of another word (eg., you censor the word "fuck", and someone says "fuckersberg"), they will not be removed.
Examples given below:
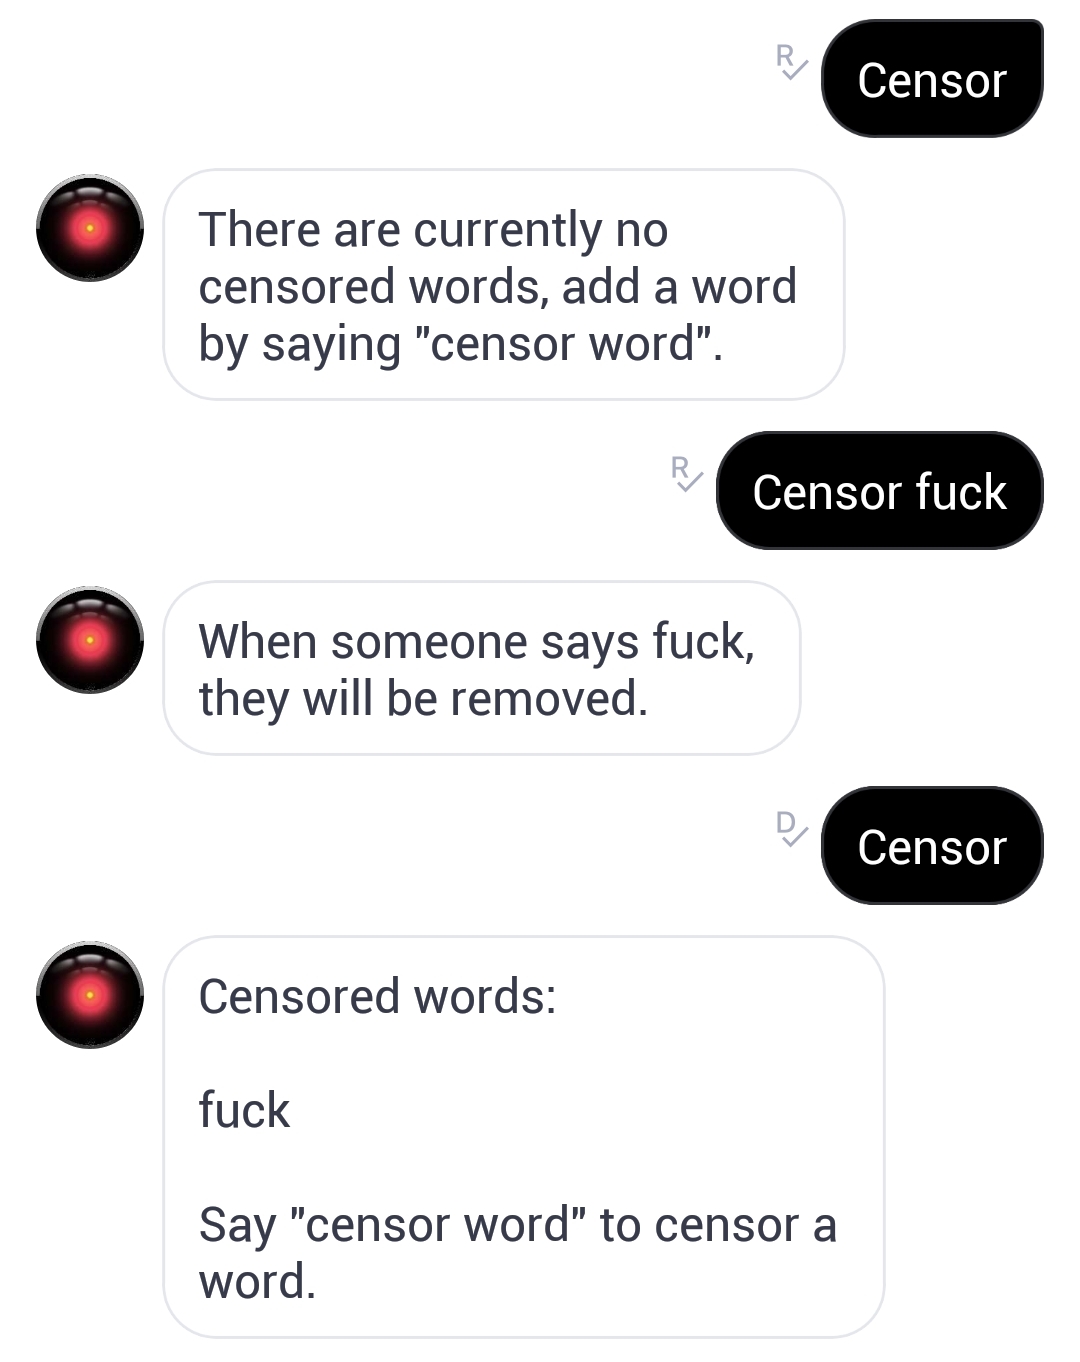 Here you see how to view the censor list and how to add a word to it.
In this example, we've added "fuck" to censor.
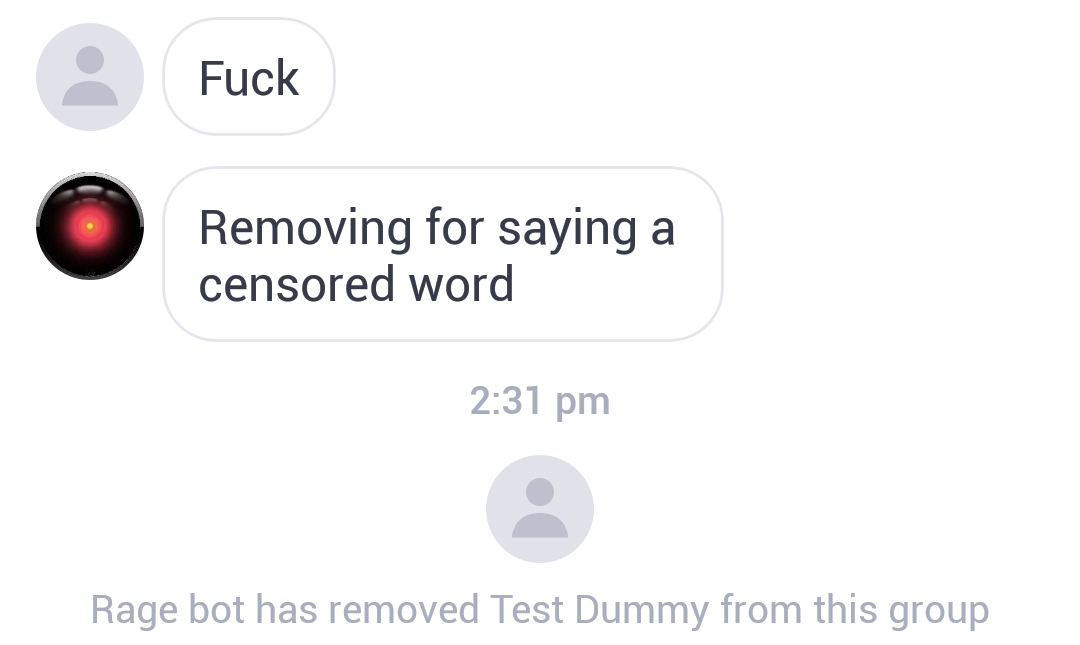 When someone says "fuck" in a stand-alone sentence, Rage will remove them.
 When someone says "fuck" as a part of a sentence, Rage will also remove them.
 When someone says "fuck" as a part of a longer word (in this example, fuckersberg), Rage will not remove them.
We've implemented it this way to narrow down the amount of unintentional removals - though this also means that if you want to completely censor a swear word such as "fuck", you will have to censor all of the derived forms of the word as well, such as "fucking" "fucker", and so on.
Furthermore, censor does not support multiple inputs - every word/sentence you want censored has to be put in one at a time.
You can also censor entire sentences by typing censor in front, such as "censor I love pineapples on pizza".
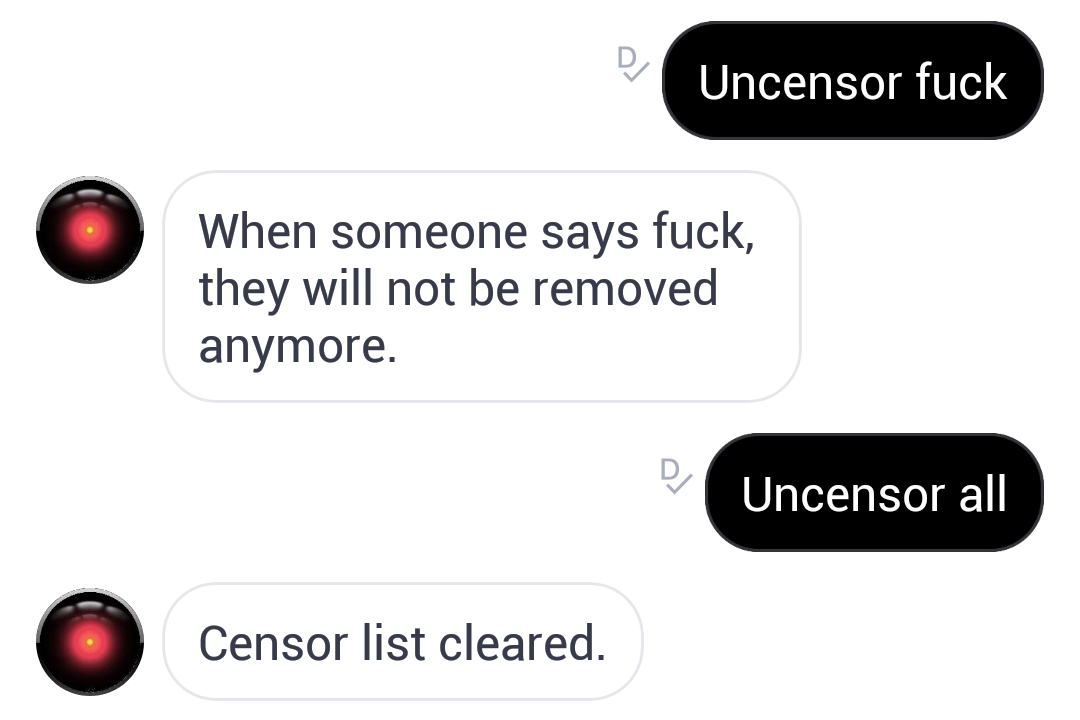 If you want to uncensor the word "fuck", type "uncensor fuck" as in the screenshot above.
If you want to completely wipe the censored list, type "uncensor all".
Warning: please think through how a word can be used in various ways and sentences before you decide to add it to the list - you could unintentionally remove users whom you don't intend to remove.
For example, if you censor the word "PM" in a group where private messages are not allowed, you may unintentionally remove a user who's complaining that someone from the group chat has sent a PM to him/her.
Set goodbye usage:
★ ✍︎ ⎘
Set goodbye byebye
Delete goodbye
With set goodbye you can set a goodbye message that Rage will post in the group chat when someone leaves.
It works in a similar way as "set rules", but just functions as a goodbye message instead.
It cannot be seen by the person who left, but it can be entertaining to the rest of the group chat.
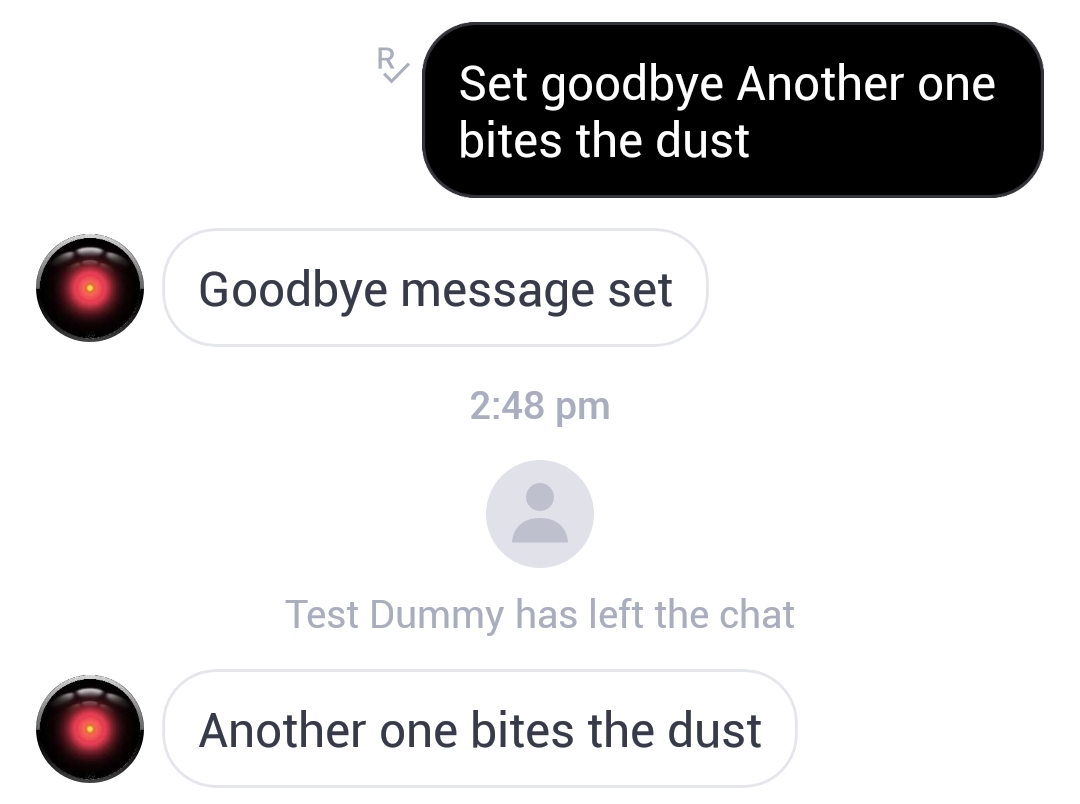 Here we set the goodbye message up with "set goodbye Another one bites the dust" - so when someone leaves, Rage says "Another one bites the dust".
Note: the goodbye message does not display if people are removed from the group chat - only if they leave by themselves. It would become too spammy otherwise.
Disallow noobs usage:
★ ⎘
Disallow noobs
Disallow noobs 10
Allow noobs (Default)
With disallow noobs, you can prevent accounts that are x amount of days old or less from joining the group.
This is especially useful for keeping out bots that Rage normally doesn't detect and keeping out fake or alt accounts.
You can either use the "disallow noobs" command without any number at the end (then it'll automatically remove accounts that are 5 days old or less), or you can insert a number at the end. Example below:
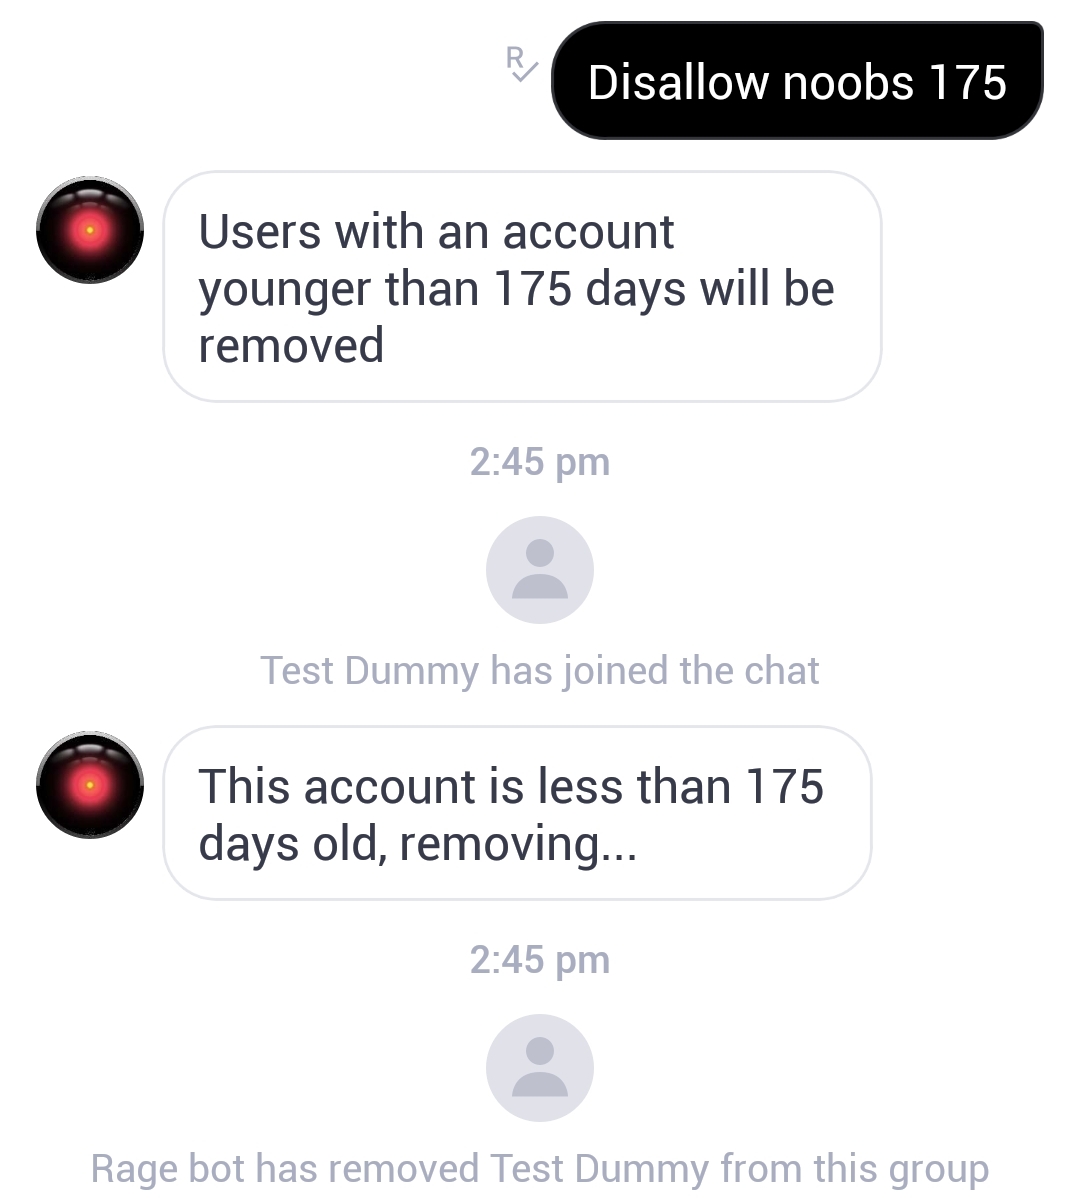 Here we set it to "disallow noobs 175" - the account that attempted to join is "only" 172 days old and was therefore removed.
You can adjust the number to any amount of days.
Disallow joining usage:
★ ✍︎ ⎘
Disallow joining
Disallow joining Message
Allow joining (Default)
With disallow joining, you can effectively lock down a group chat so that new users cannot join.
If new users attempt to join through group # (search) or invite links, Rage will remove them immediately after posting a default removal message - though Rage will not remove people who are added to the group by existing group members.
This can be useful for many things, for example - if you are doing some type of maintenance work on your group (changing rules/substitutions/etc.) and don't want new users to join in the middle of it - or if you're just looking to close down your group for the time being.
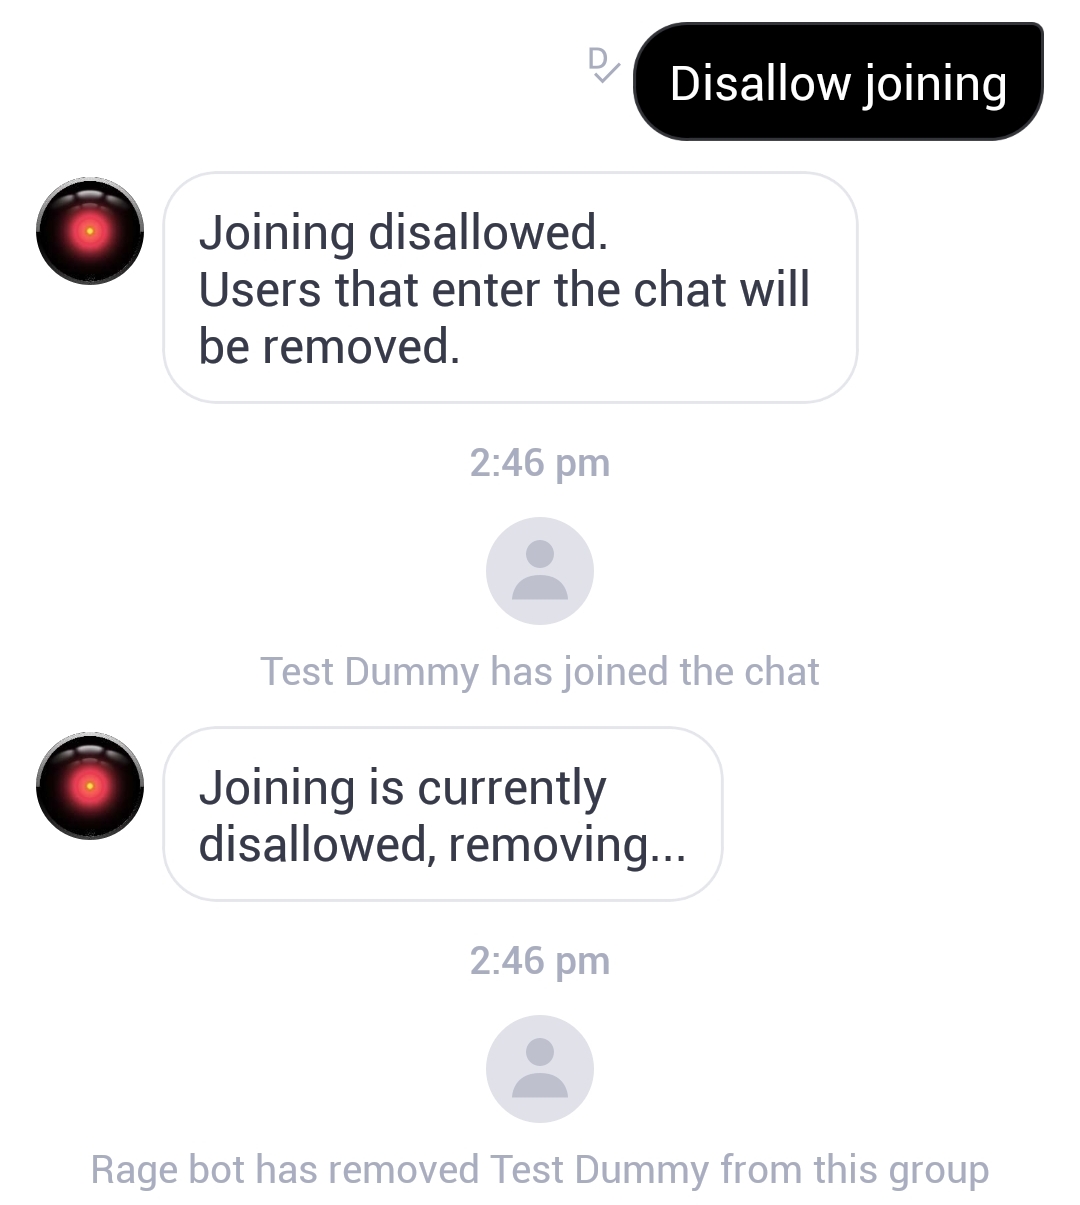 This is the default removal message when using "disallow joining".
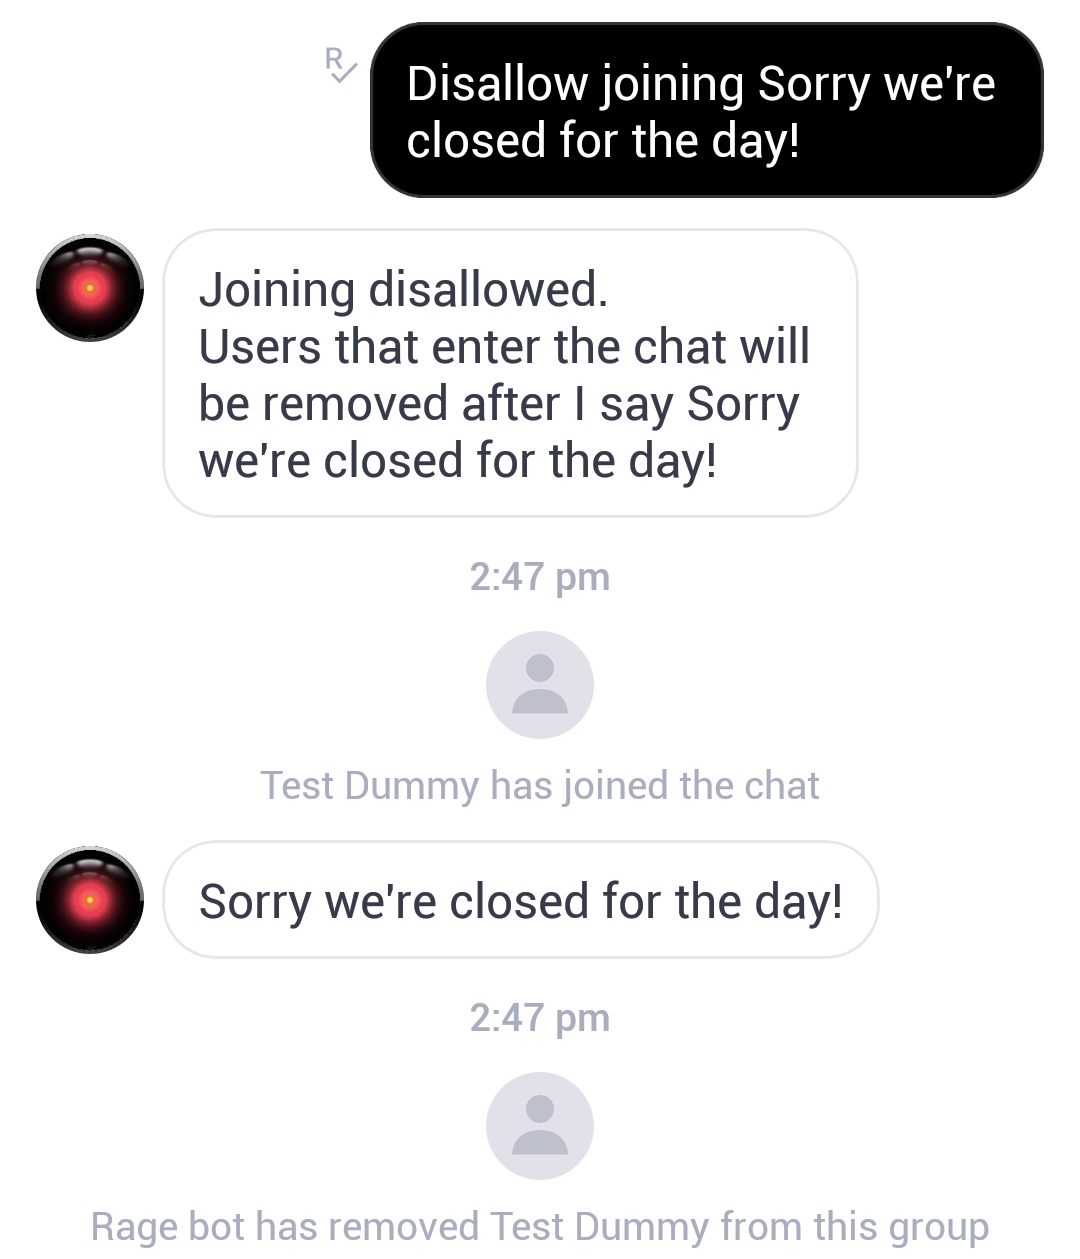 Here is how you set up a custom removal message for disallow joining.
This can be especially useful if you're running a group with verification rules - you can "disallow joining" while the admins are asleep and then do "allow joining" again in the morning.
Or you could even set it up permanently with a redirect to a verfication group that new users should join first.
The custom removal message will be saved, even after doing "allow joining" again - so you won't have to set it again the next time you lock the group.
Disallow spam usage:
★ ⎘
Disallow spam
Allow spam (Default)
With disallow spam, Rage will remove users who mass-spam from the group chat.
Though most groups will fortunately never be affected by this, some groups face a lot of issues due to trolls mass-spamming the chat.
It can be very disruptive and annoying for a group chat, so we implemented this as one of our security features.
By default, the setting will be on "allow spam" which means Rage will not offer any protection if the group is getting spammed.
But the setting is toggable and you can enable it by typing "disallow spam" in your group chat.
The feature is based on a point system - only an excessive amount of text posts within a short amount of time will be counted as spam. Gifs, stickers, images, videos and other medias will not count as spam.
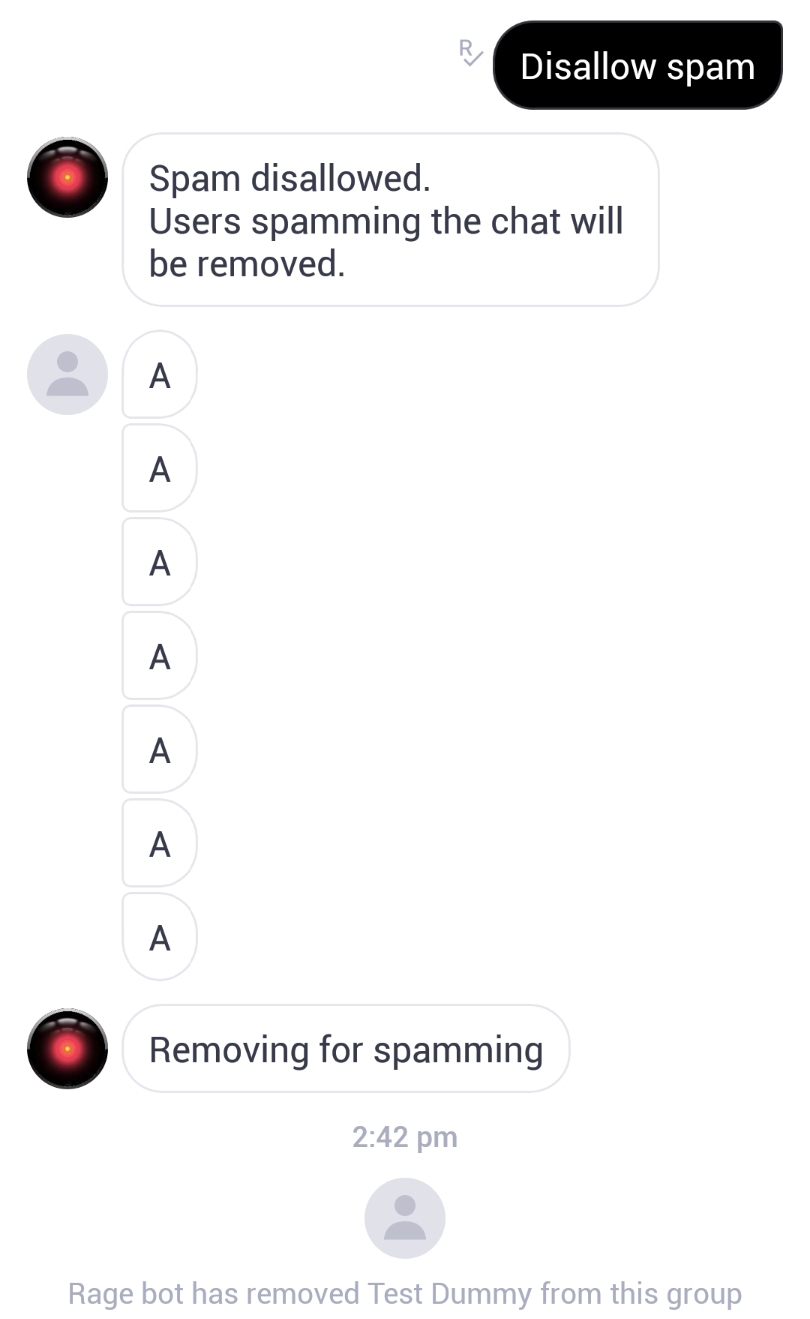 Disallowing spam and seeing it in function. Here a lot of A's were posted within just ten seconds, which triggered the spam detection and removed the user posting it.
Note: if you are admin, Rage will not react to spam posted by you.
Disallow crash codes usage:
★ ⎘
Disallow crash codes (Recommended)
Allow crash codes (Default - not recommended)
With disallow crash codes, Rage will remove users who post crash or lag codes from the group chat.
Though most groups will fortunately never be affected by this, some groups face a lot of issues due to trolls using crash codes to harass the chat.
Crash and lag codes can be incredibly disruptive for a group chat, so we implemented this as one of our security features.
By default, the setting will be on "allow crash codes" which means Rage will not offer any protection if crash codes are posted.
But the setting is toggable, and we recommend enabling it - do this by typing "disallow crash codes" in your group chat.
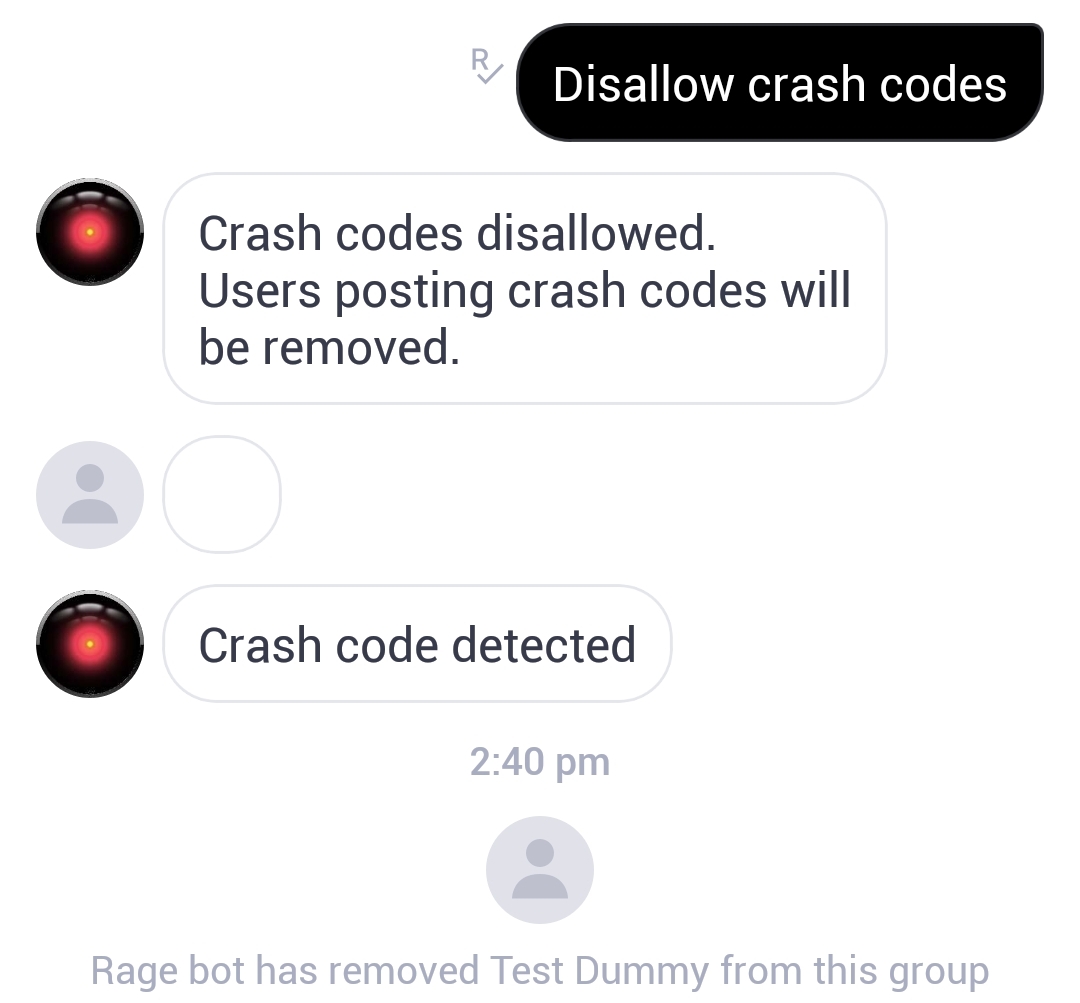 Disallowing crash codes and seeing it in function. The empty space in the screenshot was a lag code, intended to make peoples Kik lag, or maybe even crash.
Note: if you are admin, Rage will not react to crash codes posted by you.